- home
- Housing
11/20/2018 A maze for a hamster is a kind of exciting game for logic, intelligence and resourcefulness. The original attraction also plays the role of a simulator, like a running wheel - while the hamster wanders through the corridors of the labyrinth, it stretches its legs no worse than in a wheel. So that the rodent does not get bored and his leisure time is interesting and useful, it is worth providing him with such a toy. You can purchase a ready-made labyrinth at a pet store, but even better is to make an entertainment complex for the animal yourself. Then the pet will have a unique toy designed specifically for him. This is not difficult to do, but your pet’s joy will know no bounds.
Ready-made hamster cage with tunnels
You can purchase a cage equipped with tunnels at almost any large pet store.
The price for a regular cage starts from 1.5 – 2.0 thousand rubles. Tunnels add to the cost of the cell from 500 to 2.5 thousand rubles. So the FerplastLauraDecor cage costs from 3900 rubles. up to 4500, depending on the store. In this case, a separate pipe can be purchased inexpensively. On average, one tunnel link costs a little more than 200 rubles, and sometimes even cheaper. So Ferplast Pipe-bend can be bought for 184 rubles.
Tunnels and labyrinths are very important for small animals, which in nature travel long distances in search of food. In captivity, rodents are provided with food, but they need to move around quite a lot. One wheel is not enough. Labyrinths equipped with obstacles, ladders and bridges, and tunnels simulating holes and passages will help animals maintain health.
From plastic bottles
It’s worth saying right away that building a maze for a hamster from plastic bottles is more difficult than from a construction set - here a child cannot do without the help of an adult.
To work, you will need a sharp utility knife and plastic bottles. Their number can be either half a dozen or fifty. The more bottles, the longer and more interesting the labyrinth you can build.
If a hamster can be released into the labyrinths described above only under the supervision of the owner, then he can spend whole days in the bottle labyrinth. Perhaps he will be no less comfortable here than in his usual cage. And there will be much more space for physical exercise. True, a large labyrinth will take up quite a lot of space - also take this into account when starting work.
Having a sufficient amount of material, you can begin construction:
- Take two bottles. In one of them, on opposite walls, make two holes - a large one and a small one. One should correspond to the diameter of the bottle neck, and the second should correspond to the diameter of the bottle.
- Also make a hole near the neck of the second bottle so that the hamster can easily crawl through. Carefully process the edges - there should be no burrs or sharp surfaces here so that the rodent does not get injured during play.
- From the second bottle, unscrew the cap and insert the neck through the large hole, and then through the small one.
- Replace the cap of the second bottle.
Now you have a short maze consisting of two bottles. A hamster placed in one of them will be able to freely make its way into the second; all that remains is to lengthen the labyrinth to the size that seems optimal to you.
When making a labyrinth from plastic bottles, do not forget to make at least several holes in each bottle - it is best to use a thick awl or a hot nail here. Thanks to these holes, the air will be renewed, and your hamster will definitely not suffocate during his morning run.
You can create several spacious areas in the maze using five-liter water bottles. Place a small wheel in one, equip a drinking bowl and feeder in another, a house in the third, and so on. As a result, you will get not just a homemade maze for your hamster, but a full-fledged house with a treadmill.
Labyrinth for hamsters from a construction set
If you have Lego at home, it won’t be difficult to make an entertainment area out of it. Here the child will not only help, but also do most of the work. Unlike boxes, Lego does not require additional decoration, and it will not be easy to eat. Using the construction set, you can build a real obstacle course for hamsters, make arches and towers.
A little about ferrets
Recently, more and more often animal lovers choose a ferret as a pet. This animal is very funny, cute and to some extent exotic. And this choice is quite logical. Firstly, ferrets are very cheerful creatures, you won’t get bored with them, there is no end in sight to the games and fun. Secondly, the ferrets are very compact, for some this is a significant advantage, since they can be very easily transported on various trips.
Ferrets, despite the fact that they are nocturnal animals, can quite easily adapt to the life rhythm of their owner. There is no need for daily walks with these animals, like, for example, with dogs. If you decide to take your ferret for a walk, getting him accustomed to a harness won’t cause much trouble. They treat the owner friendly, get used to it well, unlike cats, but without fanaticism, like dogs. It is also worth noting that ferrets are distinguished by their extraordinary inquisitiveness of mind, intelligence and cunning.
Among representatives of the same species, you can find animals with completely different manifestations of character, therefore, you can choose a more suitable type for yourself, from super active to calmer.
What can you do for your pet yourself?
The hamster is an extremely versatile pet, since it does not require too much space to keep it, and entertainment devices can easily be constructed from what is found in every home. So what should we make ourselves?
- Cell. Build with your own hands both a temporary and permanent home for the rodent. All you need is wooden rods for the frame, plywood for the bottom and a metal mesh, preferably small, so that the baby doesn’t run away on housewarming day.
- Drinking bowl. At first, a plastic bottle and the body of a ballpoint pen can easily cope with the task of such a device.
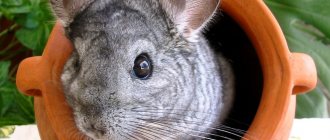
- House. To build such a structure, almost anything your imagination desires is suitable: from a plastic box to a clay vessel.
- Homemade toys and accessories for “sports” for hamsters. There are no restrictions. Make anything you want that fits in your hamster's apartment.
Of course, the list is far from complete. Make whatever you want. The main thing: do not forget that the devices should not harm the fluffy.
Mazes for rodents
Hamsters are curious and playful animals.
Give them enough toys, and the animals will entertain themselves, and people will also enjoy watching them, especially children. Running on a wheel helps the rodent warm up its muscles through active movement. But such entertainment is monotonous and uninteresting for both performers and observers. You can make a similar labyrinth yourself from scrap materials.
A simple tunnel made from a cardboard tube or a plastic bottle will interest a hamster. He will run through it in both directions with interest and climb on top. Pleasure for the animal and the children watching it. A DIY labyrinth for a hamster will provide interesting creative work for all family members and will bring joy to the animal.
You can build a playground for a hamster from a variety of objects and litter lying around, cut it from leftover materials after renovation and assemble it from plywood.
You can use cardboard, plywood, plastic bottles
How to make a tunnel for a hamster with your own hands
You can buy tunnels at a pet store or make your own. What are these structures made of:
- plastic bottles;
- toilet paper rolls;
- boxes;
- plumbing pipes.
The choice depends on the size of the animal, the materials at hand and the flight of fancy.
Tunnels for hamsters made from plastic bottles
The advantages of such structures include their safety and accessibility. Food grade plastic bottles of 1.5 and 2 liters are perfect for homemade tunnels. The choice of volume depends on the size of the hamster: 1.5 liters is enough for a Djungarian hamster, a 2 liter bottle is required for a Syrian.
To work you need a stationery knife, scissors and electrical tape. The design consists of identical nodes arranged in random order. Each node consists of two bottles, one of which “pierces” the other at a right angle. Take two bottles:
Cut two holes in one of them just below the neck. One should be small, the neck of the second bottle will fit into it, and the other should be larger, the wide part will be attached there.
Make a hole in the second bottle through which the hamster will get into it from the first.
“Pull” the second bottle through the first so that only the neck goes through.
Place the cap on the neck and screw it on. The result was a knot of two connected bottles. Make the second knot from the second and another - third bottle. Make two holes for fastening the third bottle, stepping back slightly from the bottom of the second bottle. And then, just like the first node.
Connect the lower parts 2 and 3 of the bottle with any number of nodes in any direction. In the middle of the first bottle, make an entrance for the hamsters, attach a bottle cut in half to it.
Cover the cut edges with electrical tape to prevent the animals from getting hurt. In the middle of the resulting funnel, cut two holes for the animals to pass in both directions.
You can also make tunnels for animals from colored bottles, especially if the animals are shy. Animals cannot be left alone in these structures. They can loosen or chew through the walls or suffocate in tightly closed bottles.
Hamster tunnel made from toilet paper boxes and rolls
This design is suitable for small hamsters; a large Syrian will not fit through the toilet paper roller, or it will be very inconvenient for him. Therefore, we focus on Djungarians and other kids. Such tunnels can be made in two ways: using only rollers or rollers and boxes. In the first case, you need to cut holes in the rollers and insert one into the other, as shown in the picture. These nodes then need to be connected to each other in any order.
In the second case, glue the rollers into small boxes with non-toxic glue. To do this, you first need to cut a hole in the wall of the box the width of the roll, insert the roller there and secure it with glue.
Since these passages are made of cardboard, make sure that the hamsters do not eat their way out into them.
Pipe structures
Plastic pipes for hamsters are a real godsend. They are non-toxic and have threads ready for connection. The sizes can be chosen arbitrarily, and their curves are the most intricate. Gray, transparent and white corrugated pipes are perfect for animals. From all this you can create an unusual tunnel. Don't forget to make holes for the animals to breathe in your homemade labyrinth.
What else can you make a labyrinth from?
With the help of your imagination, you can find a lot of materials in your home from which you can build an entertainment center for your pet.
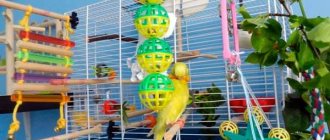
Most often, hamsters appear in a house where there are children. This means that there is a toy constructor from which you can make a colorful playroom for your pet. This building material makes it possible to come up with many solutions. From it you can build a whole labyrinth town: streets, turrets, arches, bridges, passages with second floors. Small plastic toys will perfectly complement the structure.
Among the advantages of a labyrinth made from a construction kit is the ability to quickly change the route. In a matter of seconds, you can rearrange several parts, and the hamster will have to re-create the optimal path. Stimulating mental activity will benefit the animal.
From plumbing pipes
Of all the labyrinth options, this one is considered the most expensive. But if after the repair there are still free plumbing pipes, then they can be used for entertainment for your beloved pet.
Modern products are made from non-toxic plastic, so they are safe for the animal. The pipes are threaded, making them easy to disassemble and reassemble. You can improve the design at any time.
Transparent tubes make it possible to watch the hamster's wanderings, which is very exciting. But the pets themselves prefer dark tunnels, as in natural conditions. To please both the pet and the owner, you can combine two types of plumbing pipes in the design.
Old books are also suitable for creating a labyrinth. To do this, you need to place them with their roots facing up. With the help of books, treadmills with a running width of 5–10 cm are formed. It is also advisable to fence the labyrinth with books so that the pets do not run away.
Children love to have hamster races in these book forts. The race participants are released from the cage and see who gets to the finish line first. At the exit, the winner should receive a reward in the form of a treat.
Also, when making a maze for a hamster, it will be interesting to combine different materials. For example, connect cardboard or plywood with plumbing pipes, and a children's construction set with books.
You don't have to spend money to keep your hamster happy and healthy. To do this, you only need imagination and simple materials at hand, which everyone certainly has. In addition, a handmade craft is always more valuable.
An original design for hamsters, the labyrinth provides additional entertainment for small rodents. Despite the offers from large zoo chains, it is interesting to figure out for yourself how to make a maze for a hamster with your own hands. There is nothing complicated about it.
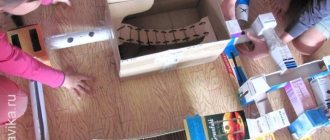
The simplest and most uncomplicated labyrinth. It can be done together with children who will willingly take part in it. For work you will need: a large box, cardboard, non-toxic glue or tape and scissors. The box itself will be the base - the room. Cut strips of arbitrary length from cardboard and stick them in the box so that they form “walls”. The animal will have to go around these walls to get to the treat. Pieces of treats should be placed in several places so that the animal is interested in looking for the “yummy”.
You can improve the labyrinth by adding a second floor to it. This can be done if the box is tall enough. You should not make the tier too high so that the baby does not damage his paws when falling.
Build a staircase to the second floor, this will help the rodent get to the top of the maze.
Such a ladder can be glued to two ledges of a “single-story” structure.
If you combine a homemade structure with a rodent cage, then there will be no additional stress for the animal. He will be able to leave the cage into the labyrinth himself. Otherwise, he must be pulled out and placed in an unfamiliar “scary” environment.
If your cage is connected to such a cardboard structure, the animal must be monitored. The rodent will very quickly figure out that the walls are vulnerable and will make a hole in it. If the parts are connected with tape, it is necessary to monitor the animal so that it does not try the tape too hard. You can glue passages made from toilet paper rolls or paper towels into the labyrinth for dzhungariks.
The cardboard structure requires frequent restoration and is not strong enough. Such a labyrinth can be made from plywood or plastic, which will last longer.
Cardboard labyrinth
Of course, the simplest option is to make mazes for hamsters from cardboard. All you need to get started is:
- two large cardboard boxes (can be purchased at any grocery store);
- scotch,
- non-toxic glue,
- scissors.
Having all these tools and materials, you can safely get to work.
One of the boxes will serve as the base and room for the labyrinth. The other should be cut into long strips no less than 10-15 centimeters high. It is advisable to think through the structure of the future labyrinth in advance and draw it on paper. Make a long tunnel with the maximum number of intersections and dead ends - then it will be more interesting for the hamster to run through it, and the audience will have much more fun.
Hamster maze made of cardboard
Now all that remains is to put the labyrinth into practice - glue the resulting strips using tape and glue. Make sure that they are held firmly, otherwise a curious hamster, trying to climb on them, will simply destroy the entire toy.
All that remains is to place the hamster’s favorite treat in different places and you can launch the main participant into the maze to see how quickly he runs through the narrow passages.
As you can see, making a maze for a hamster out of a box is very easy and simple, and the financial investment is close to zero.
Made of wood and plywood
If you don't like cardboard labyrinths, which quickly break down, then you might like the chic alternative made of plywood and wood. Of course, the work will take much more time. And you can’t just ask for material in a supermarket - you’ll have to visit a hardware store and buy a sufficient amount of material (unless you have a couple of sheets of plywood left after renovation), but the result will be simply gorgeous.
Plywood hamster labyrinth
Draw up a diagram of the future labyrinth in advance - the more complex it is, the more interesting. After this you can start working. For this you will need:
- PVA glue,
- electric jigsaw,
- ruler,
- plywood.
First, you need to put together a large box with low edges from plywood. After this, prepare a sufficient number of walls by cutting small holes in some of them so that the hamster can crawl through them. Make sure there are no sharp edges or splinters - it would be a good idea to go over the edges with fine sandpaper.
Now all that remains is to form the labyrinth. It is best to use PVA glue for this - apply it to the edge of the future wall and press firmly in the appropriate place (you can transfer the drawing to the bottom of the box in advance, drawing the location of the future walls with a simple pencil). If excess glue runs out from under the wall, you can blot it with a napkin or toilet paper.
Yes, this is not an easy-to-make cardboard hamster maze. But it will last much longer.
Single-story or multi-story: what to choose?
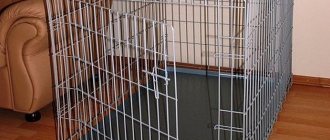
The classic option is a one-story metal cage. It is easy to disassemble, convenient and quick to clean. This design can be additionally equipped with a tunnel or pen: the dwarf will have more room to run.
The second option is a cage of several floors. For such a house there are a number of additional requirements.
Cparks/Pixabay
The distance between floors is from 17 to 25 cm. If the height is more than 30 cm, the level of injury risk increases.
The floor must be solid plastic, since food, bedding and the rodent’s paws will fall through the grate when running
Please note that the cages have height-adjustable tiers.
So which option is better? It is recommended that Djungarian hamsters choose single-story cages with a large area. Individuals love jogging and free space. This is much more interesting for them than climbing or climbing up bars.
Where is the best place to put a hamster cage?
A person’s apartment or house is a noisy and stressful place for such a miniature animal as a hamster. To limit the animal from constant stress, the cage must be placed in a suitable place.
It should be a quiet, secluded corner, protected from drafts, open sun and loud sounds. Exposure to ultraviolet radiation or wind will negatively affect the hamster’s condition (colds, overheating).
Memo for owners of Djungarian hamsters
- The furry's home should be at a distance from the music center, TV and other noisy devices.
- Temperature stability. Suitable indicators are 18-21C. When the mark drops below 10 degrees, individuals hibernate.
- Protection from cats. Djungarians are an easy target for mustachioed pets; cages should be placed out of their reach.
What should the tunnels be like?
Whether you buy ready-made hamster tunnels or create them yourself, it is important to take a few details into account. The structure should not have too high (steep) descents and ascents, otherwise the animal has every chance of getting injured
The structure should not have too high (steep) descents or ascents, otherwise the animal has every chance of getting injured.
The tunnel must have space and ventilation. This is necessary in case your pet starts playing and stays in the tunnel for a long time. Entertainment should not be accompanied by inconvenience and discomfort. And even more so, the hamster should not suffocate during its journey. Air holes must be made before presenting the toy to the hamster.
It is important to control that the animal does not chew on the structural elements, regardless of whether they are cardboard or plastic - the attraction must be beneficial. At the end of any maze (and, if possible, at different stages of the hamster’s path), you must put a treat for the little tracker
The animal’s house should not contain a pile of numerous tunnel pipes. The pet needs a spacious room
It is important to provide him with this, without forcing him to huddle in the corner of the cage. The pet should feel love and care - this will evoke reciprocal feelings in him and prolong his life
And the last thing concerns homemade structures. Glue should be used only non-toxic types, without odor and fumes. In addition, there should be no glue particles left inside the tunnel. This substance is harmful to the hamster, so it must be removed from the inner surface before the animal gets there.
How do hamsters behave in a maze of pipes and tunnels?
It is better to connect the homemade structure to the hamster’s house. This will relieve him of unnecessary stress. The hamster will not need to be taken out of the house and transferred to uncharted territory. When his interest awakens, he will go on a journey himself.
Wild hamster burrows are tunnels. Tamed hamsters instinctively feel at home in a maze, even though the tunnel is artificial. Often these tubes become the main place of residence for hamsters, so many furry owners do not welcome connecting the cage to the labyrinth. But there is no need to worry - let the animal live where it is most comfortable. The main thing is to maintain hygiene in the place of his residence.
Requirements
The main criteria when choosing a cage are its comfort and safety for your pet. In addition, the future home of a furry friend should be comfortable for its owner. The owner needs to select in advance the place where the new home will be located, and also select a product for a certain size, no less than the minimum recommended for a dzhungarik.
The materials from which the cage is made must not only be durable and strong, but also safe. Rodents taste everything they see, so the grill bars they try should not be harmful to the health of the animal.
Choose a cage that is easier to clean. It is more convenient to buy a product with a pallet. Be sure to check that the door closes well.
Djungarians are very curious creatures, prone to escape, and a weak locking device may not withstand its sharp teeth. Try to buy a home with built-in attributes in advance. This will be a more economical option, and in the future you won’t have to think about where and how best to install all the additional devices.
Materials
Pet stores offer several options for hamster cages.
Made of metal rods. A good ventilated home in which the rodent feels quite comfortable. The inconvenience is that the noise the hamster makes can be clearly heard through the bars, and dirt always forms around. Filler and debris easily penetrate through the bars. The grill itself should be made of high-quality solid metal.
Do not take products made of copper or aluminum - the animal gnaws everything, so it will quickly render such rods unusable.
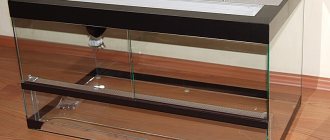
Plastic or glass aquarium. In such a closed home, the noise level is significantly reduced, and there is almost no garbage. In addition, this is the safest option for a home where there are cats - it is unlikely that a predator will get to the rodent, which is kept in an aquarium under a breathable mesh. However, the hamster himself will be uncomfortable in such a home, since it does not allow air to pass through well.
The inconvenience for the owner is that the aquarium is difficult to clean.
Lattice cage with plastic tray. This is the most preferred option. This cage is easy to clean. If the home is two-level, and the “floor” of the second floor is made in the form of a lattice, then check whether the pet is injured by getting its paws or abdomen stuck between the bars. If the risk of injury is high, cover the second level with cardboard.
It is recommended to buy cages in which the second floor is made of plastic and reinforced with high quality. Try to avoid wooden elements in the cage, as wood absorbs unpleasant odors and also becomes a favorite material for grinding down the rodent's incisors.
Designs and sizes
The length of the cage for one dwarf hamster should be at least 50 cm. This is even longer than for a Syrian hamster. And although the Syrian is larger in size than the Djungarian, the miniature pet still has to run a greater distance per day, so it needs a more spacious cage. If the cage is purchased without additional equipment, then do not forget that the area will be reduced due to the established mandatory attributes.
Another important point when choosing a cage is the gap between the rods. It should be no more than 10 mm.
Give preference to a cage with horizontal bars - rodents like this shape more, and it is much easier to attach additional devices to a horizontal grid for a comfortable life for a rodent.
If the distance between the rods is greater, the hamster will definitely try to escape. And even if the cage contains a fairly well-fed individual, this factor does not deprive it of its plasticity.
If you purchase a very spacious cage, then do not forget that cleaning the hamster is done quite often, and the large dimensions of the cage will significantly complicate this process.
However, if the owner keeps several hamsters at once and plans to breed them, then it is better to opt for a large cage. It is worth mentioning separately about the day of the dwelling. It can be with a retractable mechanism or high. A retractable bottom is much more convenient in terms of cleaning, but a cage with a high bottom is suitable for breeders, since the high sides will prevent curious little hamsters from falling out of the cage.
How to set up a cage for a Djungarian hamster
The spacious cage can accommodate additional attributes. Some of them are mandatory, others are installed at the request of the owners.
Similar products are available in any pet store, some of them are easy to make with your own hands.
An important attribute for the comfortable existence of Djungarian hamsters is bedding. This is the substrate with which the bottom is covered. You cannot take cotton wool, bandages and other materials consisting of threads for these purposes (so that the animals do not get entangled in them).
Sawdust from pine and cedar is also prohibited, as they are sources of the development of respiratory diseases in rodents.
The traditional option is sawdust from deciduous trees. Layer - at least 6 cm. An alternative is to buy ready-made litter. These are special fillers, silica gels, granular mixtures.
Other necessary “interior” elements for dzhungariks
A house is a secluded place in which the animal will store its supplies and sleep. Mandatory elements are a wide entrance and a strong roof.
Feeder - small size, spacious, sides 1-1.5 cm.
Drinking bowl - it is better to buy special products, since the hamster will turn over ordinary bowls/lids. The optimal solution is a nipple drinker attached to the outside of the cage.
A running wheel is a necessary element for the dwarf to get daily exercise, stretch his paws and train his cardiovascular system.
- diameter – not less than 20 cm;
- non-slippery surface;
- fastening to rods.
- Wheels with crossbars and mesh are prohibited.
Mineral salt stone - needed for natural needs (grinding teeth), it will also enrich the animal’s body with useful microelements.
What types of pet houses are there?
Thanks to the fact that today there are pet stores, you can find many different accessories for animals, especially rodents, including housing. They differ from each other in material of manufacture, size and purpose.
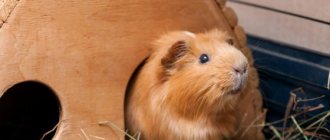
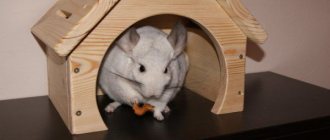
Wooden house
A wooden house for a hamster is an excellent option. Firstly, natural wood is used to make a home, and secondly, wood is a material that conducts air well, but at the same time retains heat. And this is very good, since hamsters are those who adore warm temperatures. Such a home is inexpensive and looks like a box.
Wooden dwellings come in different shapes. They can be:
- rectangular;
- oval;
- corner.
The shape itself is not important for your pet; you choose it based on the shape of your cage. You cannot take a large house and so that it completely fills the area of the cage, the rodent must always have a free corner so that it can run around or go to the toilet.
The downside of such a house is that rodents are rodents to taste absolutely everything. And it is precisely this object that will become the pet’s wooden housing, so over time it will be necessary to exchange it for a new housing.
Also, sometimes hamsters can go to the toilet at home and then wood is not a practical material, since it will be difficult to wash. But this is quite rare; hamsters are very clean people and usually go to the toilet outside the territory of their home.
Plastic house
These are the most popular types of housing for hamsters as they are practical and cheap. Plastic does not retain moisture and allows air to pass through well. Plastic material is much easier to clean from dirt and dries faster. A plastic house can be two-story, depending on your preferences.
But the disadvantage of such material is that they often use bad plastic to make such rooms and, in fact, they turn out to be quite toxic, because of this the animal will either not live at all, or it will significantly affect health and sometimes this may be fatal.
Also, as mentioned earlier, pets like to chew a lot, especially if it is plastic - it is very easy to chew it. Therefore, most likely, when you wake up one morning, you will not find the house, and again this will greatly affect the health of the pet.
Ceramic house
In fact, ceramic houses are one of the best options for hamsters. It’s easy to wash the material, and your pet won’t be able to chew it off, but such houses are quite rare and they cost a lot.
But sometimes there are problems such as the fact that ceramics do not allow air to pass through well and accumulate too much moisture inside, which can greatly affect the health of the pet. To prevent this from happening, you need to look for ceramic houses, such that there is an opening for entry and, as it were, a window for the hamster. This will make air circulation much better.
Pets are different and some will be able to gnaw off a kuramic dwelling, but others will not even touch it, but will peacefully snort there and hide food. By the way, under no circumstances throw anything out of the rodent’s home, as this will cause him anxiety and then he will refuse to sleep in it. Hamsters arrange their own homes, so first put the house in the cage so that your pet gets used to it. And then put hay inside, how much is difficult to say exactly, but half of the house should be covered with it.
Step-by-step manufacturing instructions
If you have decided what kind of cage you will make, then you can proceed to its manufacture. Below are a few options that can be created very quickly.
From the container
The easiest option is to drill holes for air exchange in a plastic container and do not change anything else. More complex - when the supporting structure is left from the container, a rectangular sector is cut out in the walls and lid and a grid is installed in their place.
For this:
- Draw rectangles on the lid and walls that will occupy 2/3 of the area. There should be at least 5 cm between them and the edge of the wall or lid. This sector is needed so that there is somewhere to attach the mesh.
- Now you need to cut out these rectangular areas. Use a sharp knife, special scissors or a saw for this.
- In the 5-centimeter zone you left, mark the locations for attaching the mesh and drill holes at these points.
- Cut a piece of wire mesh that is slightly larger than a rectangular area.
- Attach the mesh to the lid or wall using zip ties. Use prepared holes for this.
- Trim off any excess ends to prevent the ties from sticking out.
- The container is ready. Now disinfect it and you can lay the bedding and install the equipment. The layer of bedding materials must be at least 5 cm. This can be sawdust, granular bedding or any other.
- Avoid using pine and cedar shavings because they are very resinous and sharp on your hamster's paws and can injure him.
Did you know? Hamsters were "discovered" in the Syrian desert less than 100 years ago. Therefore, they became pets much later than other traditional categories of pets.
From plastic bottles
A plastic bottle is the simplest temporary “cage” for a pet. To do this, you can install the same gratings in its side as in a plastic container. You may come across a model that has several holes on the side through which you can add bedding, put a feeder, water, and let the hamster in. But most likely, such a product can be considered one of the worst options.
Its disadvantages:
- extremely inconvenient to clean;
- there is practically no access to oxygen;
- inconvenient to place and remove food.
Video: House for hamsters from a plastic bottle
Made of wood
Step-by-step instructions for making a wooden cage with a shelf or second floor:
- The basis of such a cage is a slab made of fiberboard or another. Size - 600x800 mm. You need to prepare the bars for it.
- At the corners of the slabs, one block 500 mm high is fixed. Use a drill and screws to secure them.
- On the long side, 2 more bars of the same height are mounted at a distance of 260 mm from the corner one.
- They are connected from above with planks or beams. On the short side its length will be about 540 mm, and on the long side - 740 mm.
- To make a second floor in a cage, attach small bars to the support posts on which the shelf will be laid.
- Prepare the shelf itself from a sheet of chipboard and secure it. It needs to be cleaned of burrs, sanded and coated with paint or varnish. The same is true for all wooden surfaces. The hamster will climb onto the shelf using a grate or a ladder.
- Cut pieces of mesh from the roll that are large enough to attach to the walls. For this you will need a stapler and staples.
- To cover the cage, you need to assemble a rectangular frame from wooden planks and attach a metal mesh to them.
Did you know? Keeping hamsters is prohibited in Hawaii and the state of California (USA) due to the fact that in the wild with a favorable climate they begin to multiply en masse, causing harm to agriculture.
From the box
It is not recommended to make a house from a paper or cardboard box. A hamster is a rodent and needs to constantly have its teeth ground down. Paper, including cardboard, is great for this. Depending on the activity, the hamster will need no more than a couple of days to be free.
In addition, most of the boxes are made using paints. After eating such cardboard, your pet will become poisoned. The box can also be wooden. In this case, it must be covered from above with a metal mesh. The hamster is excellent at climbing wooden surfaces and will run away as soon as it gets to the edge of the box.
We invite you to learn all the most important things for successfully keeping hamsters at home.
From the aquarium
Making an aquarium cage couldn't be easier. The presence of the product itself is sufficient. Place bedding on the bottom and place hamster toys. It is not necessary to close it from above, since a rodent will not be able to climb the glass walls.
Video: Cage - DIY hamster terrarium
Kinds
Tunnels can have different shapes, lengths, and materials of manufacture. They may even be transparent. Animals are clearly visible in them. At the same time, they feel protected and do not feel awkward from the presence of observers.
In general, the structure of tunnels is a pipe. To create a system of passages, PVC water pipes can indeed be used. There can be many options for their articulation.
Specialized pet stores offer several varieties of finished products.
Tunnels are of simple design - straight. Branched structures with a whole system of passages and dead ends are very popular.
According to their location, the tunnels can be internal, located in the cage where the rodents live. The hamster can use the “hole” at will. Sometimes an external tunnel is installed; this structure, as a rule, does not have a connection to the cage and is used in cases where the owner decides to provide entertainment for his pet. The game in such a tunnel is completely controlled by a person.
The material used to make tunnels may vary. Wood is good for this. In addition to performing its main functions, a wooden “mink” can also serve as a safe means for sharpening incisors.
Plastic pipes allow you to vary the structure of the hole. They can be given different shapes through various types of joints.
There are also supporters of nylon “minks”. When the animal moves, this design produces a peculiar rustling sound, which does not frighten the rodent at all, but, on the contrary, attracts it, perhaps imitating the sounds made by roots and straws in natural burrows.
Warm plush minks create special conditions. Playing in such a tunnel, the animal can always rest comfortably.
Boxes, boxes, tubes
There are many different boxes and boxes collected in every home. Anything will do, from long and narrow ones that held tubes of toothpaste, to small square ones that held face cream. The easiest way to make tunnels from them is transitions. Large shoe boxes for children and adults will become a kind of intermediate “stations”.
Any box can serve as a necessary thing when building a labyrinth
The benefits of such a labyrinth are twofold. It's fun for the hamster and the kids, and at the same time it uses up garbage - boxes that are no longer needed, but it's a pity to throw away. Games in such a maze are used to train a hamster.
In addition to the boxes, plastic bottles, towel and toilet paper rolls will also be used.
- Clear all found boxes of dust.
- Lay out the proposed labyrinth layout on the floor. With large boxes you can make several exits. Transitions include toothpaste packaging, sleeves and plastic bottles.
- Bend the end-closing flaps outward. They can be used to glue to a large box. Trim the necks and bottoms of the bottles and process them.
- Mark all holes for entrances. Cut them out.
- Mark labyrinths in large boxes and make bridges in them.
- It is advisable to make small holes in the upper walls so that you can see the running hamster. It will be brighter for him and fun for the children.
- In large boxes, decide on places for toys and treats.
- Glue all elements together or connect them with insulation.
- Test run the hamster.
Garbage - boxes that are no longer needed are useful for the labyrinth
The labyrinth can be redone and complicated, adding new moves. It is imperative to provide fencing to prevent the rodent from jumping into the room and starting a secret life under the sofa, actively damaging furniture and baseboards.
How to make a cage for a dwarf with your own hands
First you need to choose the material. Only non-toxic and durable elements are allowed to be used. A house for an animal can be built from unpainted boards or plywood, plastic, coconut shells and even thick cardboard
It is important to remember that homemade cages made from natural elements are short-lived, since the hamster will constantly sharpen their upholstery and walls with his teeth
How to make a reliable and safe cage: step by step processes.
The chosen material is plywood and boards. You will also need a metal mesh and plexiglass.
The necessary tools are a marker or felt-tip pen for markings, hot-melt adhesive and hot-melt gun, and a cutter.
We cut and sand 3 boards of the same size.
We drill a 5-6 cm hole in one of the boards.
We connect the resulting elements together. Coat it well with glue, keep it pressed tightly for 3-5 minutes.
We attach a metal mesh to the resulting sides from above.
Cover the remaining side with plexiglass (with hot-melt adhesive).
The fastening of parts and mesh is done strictly from the outside so that the dzhungarik does not get hurt on the protruding edges.
The design features of such a cage will allow you to freely observe your pet, and the mesh will provide a constant flow of fresh air.
Subtleties of playing with a rodent
It will be easier for your animal to get to know a new play space if there is a fragrant reward waiting for him inside. Place treats in one compartment to motivate you to travel.
Don't be surprised if the hamster takes a liking to one gallery and stays there for a long time. This means that he mistook it for a winter quarters.
Do not leave your pet unattended, because the nimble animal can run away, chew through the playground material, or even set up a toilet in one of the parts of the maze. After playing, when the hamster runs around and gets tired, return it to the cage, and clean and dry the play area .
Use your imagination, make intricate playgrounds for your pets , replace some tunnels with others, build and modify them. Involve children - their lively mind and creative approach to finding parts for the maze will surprise even experienced designers and craftsmen.
Making simple tunnels
A hamster cage must contain at least one small tunnel. And for games outside the home, complex structures of medium and large size are suitable. You can make a permanent entertainment room for your furry friend or build the attraction anew each time, changing its size and direction of moves.
Children are showing great interest in creating entertainment for hamsters. We invite you to study the instructions for creating simple tunnels that even a schoolchild will understand.
Paper tube for cage
The simplest option is to use a cardboard paper towel tube as a building material. You can put it in the cage unchanged or make windows in the tube so that the animal can come out through them.
The sleeve tube can also be installed in external cardboard labyrinths.
Game room
Do your kids love to play with and watch hamsters? Then give them an idea: make a tunnel for a hamster from an unnecessary cardboard box. The kids will happily get down to business, use their creative imagination and create an attraction with love.
There are a lot of construction options. We will tell you how to make a hamster maze in two different ways.
- The first method does not involve the use of glue. Take a box and pieces of cardboard: 3 strips should correspond in size to the length of the room, 5 to the width. On long pieces, make 5 cuts at equal distances from each other, and cut short pieces three times. Between the cuts, cut out doors, windows and holes for pipes. Now we can assemble our room. Install long partitions with the cuts up, and insert short parts into them with the cut down. You will get a lattice. If you have pipes planned, insert them into the round cutouts. Place the grid in the box and you can start playing right away!
- The second method is based on gluing the walls. It is good because you can create a variety of branches, as well as a rest room for a small creature. To glue the walls, use regular or construction tape.
Labyrinth from a construction set
Preschoolers and schoolchildren love to build various castles and fortresses from construction sets. Invite them to make an attraction for a hamster - they will happily complete this task. Moreover, children themselves know how to make a labyrinth for a hamster from Lego constructors interesting and convenient.
If you are building a walker for a dzhungarik, small parts are better suited. For the larger Syrian breed, use medium sized pieces. Using a small construction set inside the maze, you can build a small obstacle course for the animal, at the end of which you can place a tasty nut.
Book fortress
Old hardcover books are suitable for creating a large, spacious tunnel. To do this, they need to be placed with their roots facing up. It is better to completely enclose the space with books so that the hamsters do not run away in different directions. For one animal, the width of the passage can be 5-8 cm (so that the animal can easily turn around in it), but if you have several fluffies, the tunnels should be more spacious.
In such a book fortress, kids really love to have hamster races. Rodents are placed in a common closed room, after which they open the “door” and watch which of the animals gets to the exit first
At the same time, it is important to ensure that race participants do not violate the rules. If a cunning hamster climbs over the wall, he must be brought back
A maze made from books can also be used to train animals. To do this, you need to place small pieces of tasty food along the chosen path, and repeat the operation several times with the same route. Then you should place the treat only at the exit. You will be surprised how quickly your smart hamster will find it!
Tunnel made of plumbing parts
If your apartment has recently been renovated and you still have unnecessary parts for connecting pipes, use them to create a branched labyrinth! This attraction is suitable for both small Djungarian and larger Syrian and Caucasian hamsters. By the way, the tunnel made from plumbing looks very original. Another advantage is the collapsible design of the attraction, which means you can periodically change the direction of the moves.
Making it is very simple: connect the parts in any direction. It will be more interesting for the hamster to play if there are several exits in the pipe. But in this case, do not leave the home unattended, otherwise you will have to look for it throughout the apartment!
PROJECT MYSHKO - sample testing
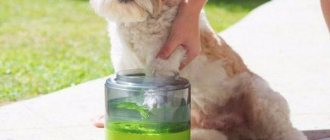
We used two mice as maze testers, which Martin, the rodent owner, fearlessly donated for this purpose.
Yes, Martin also has a cat living next to the mice at home. And here are our testers!
The mouse den is assembled and ready for testing.
Natural curiosity makes itself felt, and the brave explorer enters the hole.
The entrance bottle seems narrow at first glance, but the mouse can easily turn around in it.
The second tester decided to break the agreement and tried to leave the laboratory.
Meanwhile, our first, bravest mouse was already exploring the unusual hole with all his might.
It looks like he smelled the cheese we left in the feeding block.
Yes, the mission was successful.
But the research didn't end there.
The bottles turned out to be not as tasty as the cheese.
I couldn’t get through the neck, but it’s still interesting what’s on the other side.
As soon as the feeder was removed, a curious tester was right there.
By the way, the labyrinth can be disconnected from the cage, just don’t forget to close the front door