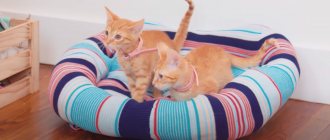
Some people keep cats in their apartments and never let them outside, while others allow their pet to roam freely and come home whenever he wants. Owners of private houses cannot keep their cats from wandering. But what if your pet gets lost or gets into trouble? It is much easier to find the owner of the animal if he has a collar with the pet's name, phone number or address of the owner.
In this article we will tell you how to make a stylish collar with a medallion for a cat.
Why do you need a collar?
Many cats do not walk outside, then the question arises: why does she need a collar? After all, this is not a dog. But not only those animals that go outside wear a collar. It all depends on the purpose of the collar.
Most cat collars are designed for beauty purposes and are used as accessories. Some may have contact information about the owners, so that if lost, kind people can find you and return your pet to you. This technique is often used by owners of purebred and expensive cats.
Another option is anti-parasite collars. They are worn by animals for medicinal or preventive purposes. Such collars are not made at home, but are purchased in specialized veterinary stores.
Therefore, making a cat collar with your own hands will differ depending on the purpose for which you will use this device.
Types of collars
You will probably be surprised, but if you approach the issue of buying a collar with all seriousness, then the variety of shapes and sizes will frighten even an experienced four-legged owner. Each manufacturer makes its own arguments and demonstrates the advantages of its products.
Anti-parasitic collar (from fleas and ticks) - a rubber product impregnated with repellent. Naturally, you cannot make such a collar yourself; you need to buy it. However, a sad anti-parasitic collar can be decorated; it won’t make it any worse.
Important! Carefully study the instructions for wearing an anti-parasitic collar; some brands warn that their accessories can only be used from a certain age and should not be used by pregnant or lactating cats.
A decorative collar (not a walking one) is a widely popular accessory for cats participating in exhibitions and shows. Choosing a decorative collar is a whole science. Some cats need accessories in contrasting colors, while others prefer collars that blend in with the fur and are decorated with a pendant. The width of the collar is also important, since it should not visually distort the proportions of the animal’s body. If you are unsure which collar is right for your pet, the choice should be based on the criteria of lightness (low weight) and softness of the material.
Decorative collars that are not for walking purposes can be purchased from folk craftsmen. The fact is that beautiful, bright and exclusive collars are not difficult to make at home. Below you will find step-by-step instructions for making different types of these accessories. Prices for handmade products fluctuate and mainly depend on the workload and reputation of the craftsman.
Walking collar – the difference between this and the previous model is the presence of a clasp that will open under the weight of the cat’s body. The fact is that while walking, a cat can get caught on something. There are known cases where pets hung on branches, fences, table hooks and suffocated. A cat can get stuck if it tries to crawl through a narrow gap and starve to death. The self-release mechanism will release your pet from captivity if sufficient pressure is applied to it.
Advice: if you want your pet to always be safe, do not let him go for walks unattended. Any cat that wants to go outside can be trained to wear a harness and be walked on a leash.
A collar with an address tag is the most useful variety, as it serves not only for decoration, but also for security. An address tag helps pets find their way home, and if you think your cat won't get lost because she won't leave the house, don't be overconfident. Hundreds of animals disappear without a trace, falling out of a window or running out the door in the chaos. Of course, you are not obligated to buy exactly the proposed model; the token can be purchased separately or made.
Note! A collar with a bell (bell) is used only for independent walks.
The function of such an accessory is to prevent hunting so that the cat cannot catch a bird or rodent (a potential carrier of a virus or parasites). The 24-hour ringing with every step will greatly irritate your pet.
Which material to choose?
The collar implies its constant use, that is, your pet will be wearing it all the time. Therefore, the choice of material must be taken seriously. First of all, it must be safe for the animal. Good for this:
- leather;
- thick fabric;
- ribbons;
- rubber bands.
If you want to use accessories to make a cat collar with your own hands, then when choosing them you need to be guided by the fact that they should be light and durable. You can use light metal, plastic or silicone.
The collar clasps should also be strong and secure. For this purpose, buttons, Velcro or strap fasteners will do.
collar collar
Such a collar can be made extremely simply and quickly, and most importantly, it will be simply irresistible to any cat. The master class below will show you how to make this decoration.
This stylish cat collar requires only a shirt and scissors. The shirt can be absolutely any, plain or checkered, worn or initially not the right size for the owner. In other words, a shirt that no one will wear again. An excellent method for recycling old clothes.
First of all, you should remove the tag so that it does not cause discomfort to your pet.
It is convenient to cut a buttoned collar in a circle, being careful not to touch the threads, otherwise the product may become frayed over time. If desired, you can sew the edges by machine or overcast them by hand.
You can surprise your friends and neighbors with such an unusual design. It is important that the selected shirt matches the pet’s fur well in tone, then its image will be simply flawless.
Sew a collar for a cat
Before you decide how to sew a cat collar with your own hands, you need to decide on the dimensions. It is important that the collar fits tightly to the cat's neck, but does not choke it! A collar that dangles loosely is also not suitable, since the animal can easily get rid of it or lose it.
So, take a soft meter (the kind your grandmother or mother probably used) and grab the cat's neck without squeezing it. We will sew the accessory using these dimensions.
Next, having decided on the type of fastener, we make a pattern. It will be in the shape of a rectangle of the width you need. Also remember to leave 15cm free end and seam allowance. Here it is necessary to take into account that the coarser the material for the collar, the more allowances will have to be left.
It should be noted that when choosing a material, you need to take into account its lack of odor. A strong and unpleasant smell can scare away a cat.
Then we stitch the entire collar around the perimeter on one side and turn it inside out to the other side. Next, we sew on the fastener and, if necessary, process the holes so that they do not fray. Now all that remains is to present your creation to your ward.
How to put a collar on a cat and train it to use it
Let's look at how to put a collar or harness on a cat for the first time, and how to teach the animal to walk in such “accumulation”:
- When you bring a new product into the house, let your pet sniff it thoroughly, play with it, lure it with a strap, and shake it. Let the pet become interested and accept this item.
- After this, the collar or harness can already be put on. The first time is very short, just a few minutes. The cat will initially resist and try to pull the strap off its neck. Don't interfere. After a while, put it on again.
- You can try putting a harness or collar on a hungry animal before eating. The feeling of hunger distracts the cat from other little things, and food acts as a kind of reward for putting on the strap. After a successful few minutes in the new “outfit,” reward your pet with some cat treats.
- When your pet is already able to walk for several minutes in a collar or harness, begin to increase the time the accessory is worn, bringing it to several hours.
- And only when the cat stops noticing the presence of the strap can it be left for constant wear.
Important! It is recommended to take your pet for a walk on a leash only after he has been able to walk in a harness for several hours at home.
Moreover, it is not enough just to have the product on the pet’s body; he must also get used to walking on a leash. To do this, try practicing this at home. Unobtrusively lead the cat along, call him with a treat, and give him a treat if the attempt is successful. And only after that go outside.
To put on the product and get used to it, you should follow the following tips:
- You should not immediately try to put a new accessory on the kitten’s neck; you need to give him time to get acquainted with the new interesting detail. Once he gets used to the strap, you can try putting it on.
- The first time you need to leave the structure for 10-15 minutes so that the cat does not experience any discomfort. Most likely, the pet will resist and remove the product after a while; there is no need to correct anything.
- Veterinarians advise putting the collar on before eating. This will help distract the kitten from the accessory on the neck and cause rapid addiction.
- When the animal can calmly walk in a collar for 20-30 minutes, we can consider that most of the work is done. Now you can leave the accessories for 1-2 hours, and soon you will completely accustom your pet to constant wear.
Important! Over time, the cat will get used to the presence of the strap around its neck and will not notice it.
Collar with medallion
This accessory option will be more expensive both in terms of finances and time. In order to make a DIY cat collar with a medallion, we will need:
- thick steel plate;
- blank for medallion;
- cores with letters or numbers (depending on the inscription);
- hammer;
- masking tape;
- a steel ring on which the medallion will hang;
- favorite cat collar;
- permanent marker (optional).
Here a ready-made collar is used, but the name medallion is made by hand. So, we fix the blank for the medallion with masking tape on the steel plate so that there is space left for the inscription.
Next we mint the inscription. After making sure that the inscription will fit in width on the medallion, we place the core with the middle element of the inscription in the center of the workpiece. We hit the core several times with a hammer. We do the same with the remaining letters.
You can write out the cat's name, residential address or mobile number. The inscription can also be made on both sides of the workpiece.
Next, we paint over the inscription with a permanent marker to make it easier to read. We drill a hole on the medallion with a thin drill, thread a ring through it and hang it on the collar. The collar with a name medallion for your fashionista is ready.
Making a collar - instructions
When you decide to try making a cat collar with your own hands, keep in mind that this activity takes a lot of time (especially if you are a beginner), but it can also bring real income. By making original collars at home, you can sell. One of the unconditional instincts of a person is the desire for individuality, even if it is expressed in the appearance of a pet.
Having gained a little experience in making simple collars, you can try your hand at weaving. Naturally, this is a long journey that requires effort and perseverance, but think about what you have to lose? Even if you decide that making decorative accessories is not your thing, your pet will have new decorations that will delight you and your guests.
Useful tips
When choosing jewelry for a collar, evaluate the weight of the finished accessory. It is worth considering that cats, in principle, do not like collars, and if the accessory interferes, presses or has other negative effects, both you and your pet will have problems. If you really like decorations, but they seem heavy, use them in small quantities.
Ribbons, chains, laces and other decorations of this type must be carefully attached to the collar, as they can get in the way of the cat. Make sure that during wearing, the accessories do not tear, do not unravel on threads and do not interfere with the cat when walking. It is also recommended to remove bulky decorative collars while sleeping.
Important! The decorative collar should not have loose loops, ends of ribbons or chains, since the cat can get caught in these fragments while jumping.
Every pet can have allergies, including contact allergies. The owner usually finds out whether a pet suffers from an illness after the fact. When making decorative collars, you need to prepare in advance for possible consequences. Inspect the cat's skin under the collar several times a day (in the first days of wearing it) and if there is irritation, remove the accessory.
Decorative collar made of beads
A very beautiful, decorative collar that can be made in 15–20 minutes. This accessory is not suitable for constant wear, especially if the cat has long hair. The collar is made from:
- A thin but strong elastic band (cannot be made from rope or fishing line, since the collar must stretch).
- Large beads.
- Fasteners - optional, the ends can be tied together and the collar will be solid.
In addition to supplies, you will need sharp scissors. To weave a collar for a medium cat, you will need a 0.5 m piece of elastic. Weaving is very simple, bend the elastic in half and mark the center. We put on three beads, and use the fourth for fixation. The resulting ring should be approximately at the center of the elastic band. We split the elastic band in two again, put on one bead at a time, and fix the third one. In this way we collect the required number of ring links. Make sure that the elastic is not too tight; the weaving should “play” as it were.
Tip: If you don't have a matching clasp, simply tie the remaining elastic tails and thread them through the first link ring.
Collar with medallion
A comprehensive accessory that allows you not only to decorate your pet, but also to protect it. The importance of a name tag is difficult to overestimate, because if a pet gets lost, its chances of returning home increase significantly . The manufacturing technology is not the simplest; it requires a set of bits with letters. If neither you nor your friends have such tools, there is no need to buy them. You can order an engraving on the token.
Have you decided to make a completely exclusive accessory? Great! you will need:
- Any collar you like.
- Blank for a medallion with or without a loop. If there is no loop, you need to drill a hole in the workpiece for the ring.
- Bits (cores) with the necessary letters - the size and quantity depends on the name of your ward.
- Tight, preferably a steel ring.
- A rigid plate that will not vibrate when struck by milk, for example, thick steel.
- Hammer.
- Mounting tape.
- Alcohol and permanent marker.
Note! If there is a clasp, the collar can be cut from the belt.
By the way, if you have a belt that you are ready to convert into a collar, you can turn to an atelier or shoemaker’s workshop for help. It will be more convenient for you if the collar is adjusted to size and equipped with drawstrings and rivets.
You need to place the letters as evenly as possible and at the same distance. The blank for the medallion must be secured to the platinum so that there is space in the middle for the letters. Using the straight edges of the tape as a guide, mark the middle of the token with a pencil. Focusing on the mark, place the bat and confidently hit the hammer several times.
Tip: use large letters for your name (if the name size allows), and medium letters for your phone number and contact information, so the inscriptions will look neater.
Typically, on one side of the address tag is the owner's nickname, on the second side is the owner's address and/or phone number. If you have rolls of different sizes at your disposal and the desire to do delicate work, you can emboss additional inscriptions, for example, “They are looking for me” or “Bring me home.”
Tip: if you plan to put several inscriptions on a token, it is advisable to have several blanks in reserve.
Before you start stamping the inscription on the workpiece, it is better to practice. To carve a clear letter, you need a certain impact force, and besides, the result obtained may not suit you (spacing, size of letters). Practice on metal that is similar in stiffness to your workpiece. Simply put, if the workpiece is made of brass, then it is better to conduct training on tin or other metal. If you practice on thin aluminum, the force of your (trained) hammer blow will not be enough to stamp a letter on brass.
Tip: the embossed letters on the token will not contrast, that is, a person passing by may not understand that something is written on it. By shading the letters with a permanent marker, you will correct the situation. In order for the paint to adhere better, the surface must be degreased with alcohol.
The collar with the medallion is ready, the latter needs to be put on the ring and secured. Be careful when choosing a workpiece; it should not interfere with the animal and should not be too heavy. If your pet is not happy with the new thing, you should accustom him to wearing the medallion gradually. Please note that the collar must be removed sometimes, otherwise the cat will not be able to scratch its neck, and creases will appear on the fur.
Silicone collar with spikes (decorative)
Who wouldn't stop their eyes on a brutal pet with spikes on its collar? Naturally, such an accessory is not suitable for constant wear. A collar with spikes can be dangerous if there are other animals in the house. Such decoration is not recommended for large, temperamental cats.
The basis is a silicone bracelet, which can be bought or received at various events (blood donation, charity). If you have a bracelet, you will need:
- Spikes - can be found in almost all stores for needlewomen and seamstresses.
- Thin fishing line or strong thread.
- Needle with suitable eye.
The silicone bracelet is easy to pierce with a needle and you can sew the spikes at the same distance. The second option (you will need sharp small scissors for this) is to cut small holes, smaller in diameter than the base of the tenon. The bases of the spikes are threaded into the resulting small holes (silicone stretches well). The bases of the spikes must be secured with thread or fishing line.
Important! Silicone collars are strictly not recommended for large cats. Make sure that your finger fits freely between the cat's neck and collar.
Silicone collar with beads
Another great option for making a beautiful collar in 15-30 minutes (if you have all the materials). The basis, as in the previous version, is a silicone bracelet. The color is not important, only your preferences play a role here.
It is advisable that the color of the beads contrasts with the color of the bracelet, for example, mother-of-pearl and black. In addition to the bracelet you will need:
- Sharp scissors.
- Thin line.
- Needle with a large eye.
It is better to fasten the beads with one thread (rather than separately), since the knots will irritate the cat. Carefully melt the site of the knot over the fire and smooth it out.
Decorative collar with button
A very simple option for making a decorative collar. With a little practice, you will be able to make various and absolutely exclusive collars for your pet from elastic bands, fasteners and various decorative accessories.
Knitted collar
All possibilities are open for experienced and beginner knitters. A collar of any complexity, color and configuration can be knitted, either knitted or crocheted. It is better to choose soft wool, iris or similar materials from raw materials. It is better to knit round or narrow collars for fluffy cats, and wide ones for hairless and short-haired cats.
5-6 or more empty loops are crocheted, depending on how wide the collar you need to get. The next row is a connecting column (the same number of loops). Next, a sufficient number of rows are collected, depending on the girth of the cat’s neck. The last row is sewn on with a clasp, a loop, or any other method convenient for you (and the cat).
When knitting, the pattern is similar: the width is 5–7 loops, the length depends on the girth of the neck, the end of the collar is knitted under a loop or clasp. It is better to knit so that all the front loops are facing the same direction - this way the collar will not twist into a spiral.
Harness vest
If you have a sewing machine and basic cutting and sewing skills, you don’t have to stop at making collars. The video below contains instructions for making a light, comfortable and practical harness. Please note that on the back of the product there is a loop for a carabiner, and the harness itself is suitable for walking your pet outside.
Stacked collar made of beads and accessories
Making beads is probably the easiest and fastest way to please yourself and your pet with a beautiful collar. In just 5 minutes and without much difficulty you can pick up a thin “bauble”. If you have all the accessories, you can make a personalized collar in 10 minutes, yes, it's that simple.
With experience and perseverance, you can weave a wide collar and if you make it not from threads, but, for example, from fishing line and large beads, such an accessory can be used on a walk.
For weaving, you can use jewelry making instructions, most of them contain detailed, step-by-step instructions.
Round collar collar
A round collar is a decorative accessory that can surprise your guests or delight you with an unusual look. Collar decorations can be made from ribbons, embroidery, beads, rhinestones, lace, braid, lace and other light accessories. The product will turn out neater if you use a sewing machine, but if you don't have the skills, don't worry! A little patience and you can sew a collar by hand, especially since step-by-step instructions are given below.
The piece of fabric from which you are making the collar needs to be folded in half and the pattern is transferred to the folded flap. To adjust the pattern, you will need to measure the circumference of your pet's neck. The lining (it is better to make it so that the collar fits well) is made using the same pattern.
Note! An example pattern was compiled for a large cat with a neck circumference of 36 cm.
In the diagram you see symbols where:
- AB, DS are equal values obtained by dividing the neck coverage in half. Do not forget about allowances, at least 1 cm on each side.
- AD, BC are equal values obtained by folding the width of the collar, taking into account the fold and allowance (11 cm in the diagram).
Choose a collar height that is comfortable for the cat, approximately 4–6 cm, and set this distance from point D on the pattern. B is the upper right point, from it we measure 2 cm to the left, we get point L. An oblique, divided into 3 equal parts, connects point L and the height of the collar (point 6 in the diagram). The dotted line is a guideline, the stitching line is curved, so 2 allowances are laid from the bias L-6, according to the pattern of 1.5 and 2 cm.
The bend ascending from the DS line to the BS line is displayed as follows:
- Divide the DS into three equal segments.
- From left to right from the first point and the second point, 2 allowances break off, the second is 2–2.5 cm larger than the second.
Next, the pattern needs to be carefully unfolded and basted. If your pet does not have a lively disposition, it will not hurt to try on a collar. When you are sure that you and the cat are happy with everything, the product needs to be stitched or stitched. Be careful that a collar that is too high may irritate your cat.
Collar with butterfly
This accessory is not suitable for walking a cat, but as a decorative decoration it will amaze any lover of four-legged animals. The manufacturing pattern is very similar to the one below, the only difference is the shape of the collar and the presence of a charming butterfly.
As in the above example, the pattern is designed for a large cat with a neck diameter of 36 cm. The designations on the pattern are:
- AB, DS are equal indicators obtained by adding half the neck circumference and 12 cm.
- AD, BC are equal indicators obtained by measuring the height of the collar in its widest part (from the lower corner). In the diagram, the collar height is 5 cm.
The top line is almost straight, the bend is created by putting 3–5 cm down from point A (5 cm in the example). Next, the point of the other left B is connected by a straight dotted line with the received point (3–5 cm below A). We divide the resulting dotted line in half and lower a perpendicular 0.5–1 cm from its middle. The curved line, which we obtain by connecting three points, will be the stitching line.
Next, from point C to the left we set aside 1/5 of the length DS, and from D 1/2 of the previous length (in the example, these are 6 and 3 cm). The resulting marks are connected by a dotted line, which is divided in half. We put 0.5–1 cm upward from the middle of the dotted line to get a bend. Similarly, dotted lines are drawn on the pattern on sides AB, BC.
We unfold the resulting pattern, pre-baste it and try it on the pet. The corners of the collar must be rigid (otherwise they will bend), so you need to make a lining or strengthen the fabric in some other way.
Spiked Collar
In this option, a silicone wrist bracelet is used as the basis for the collar. This is convenient because you don’t have to worry about attaching fasteners. In addition, silicone stretches well. But you should keep in mind that such an accessory is not suitable for large and well-fed cats.
So, we take the decorative spikes and, using a needle and thread, firmly grab them to the bracelet. You can leave the interval between them as you wish, but we suggest approximately 2-3 cm. The brutal accessory for your cat is ready.
There are many more options that you can use when making a cat collar with your own hands. For example, you can use the Shambhala technique and weave a collar from strong threads or thin strips of leather.
Practical collar
The next version of a homemade collar, the templates of which are presented here, is more practical and perfect for outdoor cats.
To make it you will need:
- nylon sling;
- ribbon with ornament;
- plastic fastener;
- plastic buckle;
- half ring
Regarding the width of materials, 1.25 cm is optimal for a cat's neck.
First, the colored ribbon is sewn to the sling using a sewing machine. Stitch length 2 mm. The tape is stitched along the entire length on both sides, as well as across the edges.
Then you can start attaching the fastener. Having unfastened it, you need to pass the end of the sling through one of the elements, bend it and sew it to the base of the collar at the bend. It is recommended to sew stitches in several rows.
Next, the free end of the sling is threaded through the half ring. It is moved as close to the beginning as possible and stitched again across the sling, using the remainder of the material threaded through the fastener to secure the half ring.
After this, the other side of the future product is threaded through a plastic buckle, and then the second part of the fastener is secured at the end, bending the sling with a margin larger than the previous time.
Next, the end of the sling needs to be bent back a little and stitched across several times, thereby securing the buckle. All that remains is to try the collar on your pet.
Braided collar pattern
For advanced needlewomen, it will not be difficult to knit or crochet a collar or weave it using the macrame technique. Embroidery would also be appropriate here. In addition, the pattern can be completely different. It could even be the name of your pet, place of residence, or a contact phone number that can be used in the event of a loss of the animal.
You see in the photo a DIY cat collar using the macrame technique, which is used for weaving bracelets and belts.
The technology of weaving baubles is also popular. This accessory will undoubtedly please your ward.
Harness or leash - which is better for a walk?
An owner who decides to take his pet outside for the first time has to make a difficult choice. Of course, you can carry a cat in your arms and let it go in a quiet place, but the likelihood that the animal will get scared of something and fly up a tree like a bullet is very high. Despite the belief that cats are excellent at climbing trees, not every cat can climb down on its own.
It is much easier to restrain the cat so that it cannot run far. When choosing between a leash and a harness, you should choose the second one, because the cat’s neck is thin and fragile. It is very easy to injure her with a collar. And if you don’t tighten it tightly enough, the animal will simply wriggle out of it, leaving an empty collar in the owner’s hands.
The harness is attached in two places: on the chest and behind the front paws. This design prevents the animal from being able to get out of the harness on its own.
If you plan to walk your cat constantly, then you need to teach it to get ready for a walk from early childhood.
In this case, the animal will not have stress from an unfamiliar place and from putting a strange object on it. Don’t forget that cats are quite freedom-loving and rarely tolerate experiments on themselves.
Postoperative collar
Sometimes a collar has to be put on a cat not for aesthetic reasons, but out of necessity. These collars are called veterinary collars. Often they are simply purchased at veterinary pharmacies. However, you can make a post-op collar for your cat with your own hands. We will present an option for making a protective Elizabethan collar.
To do this, we must take two measurements: the girth of the cat’s neck and the length from the neck to the tip of the nose + 5 cm. Next, we make a pattern in the form of half a bagel: the inner small circle is the girth of the cat’s neck, and the outer large one will be at a distance of the width of the collar and repeat the shape internal.
For manufacturing we will need any fabric and dense material such as plastic. We cut out one pattern from plastic and two patterns from fabric (with seam allowance). We sew one edge of the fabric patterns, insert the plastic pattern and sew the bottom edge of the fabric pattern. The edging can be made from a strip of any fabric.
For greater comfort for your pet, you can insert a layer of foam rubber into the inside of the collar, the same size as the plastic pattern.
Velcro is sewn on both ends of the steering wheel. Or you can use lacing. The protective Elizabethan collar is ready. Your cat will feel comfortable, soft and comfortable in it, and most importantly, safe.
As you can see, there are now countless techniques for making DIY cat collars with step-by-step instructions. All you have to do is choose the most suitable option and bring it to life.
What is the collar for?
First of all, this accessory makes it clear that the cat it is wearing is not a street stray, but a pet. You can hang a keychain or capsule with your contacts on the collar so that your pet can be returned to you without any problems if it suddenly gets lost during a walk.
Typically, the following materials are used to make collars:
- nylon;
- Genuine Leather;
- velvet;
- velours;
- metal.
When choosing a material, consider some features. For example, you should not put metal chains on your cat in the rain or winter.
Simple leather collar
Clasps for collars can be either metal or plastic. The second option is better: fastex can adjust the length of the collar down to a millimeter; this does not require holes in the strap. There are even special safety fasteners that can snap off when pulled if the cat gets caught on a branch, for example.
If this type of fastener seems expensive to you, you can, when making your own collar, connect the ends with rough Velcro. You can also carefully trim the collar in several places (if it is made of fabric or thin leather) so that it breaks under critical tension.
So, we figured out the materials and accessories. Now a few words about how to calculate the size of a product. The optimal length of the collar is calculated using the formula “neck volume plus two fingers.” If you don't have a measuring tape on hand, you can use a string and mark the required distance with knots on it.
The collar should fit tightly and at the same time not squeeze the throat. A cat can easily remove a dangling collar over its head, or catch it on a fence, branch or cabinet handle. If the strap presses, breathing will become difficult and blood circulation will be impaired. Calculate the length of the collar so that the tip protruding from under the clasp is short.