Types of nesting houses
Before you start assembling the future “maternity hospital”, it is advisable to find out what types there are. There are three types of nesting houses for budgerigars. Horizontal, vertical and combined.
Horizontal house
Have you decided to make a horizontal nest for your budgerigar? Remember: you don’t have to work too hard to create it. Parrots will refuse to live in the nesting house. It is needed only for breeding offspring.
The main advantage of the horizontal monastery is its location. The width of the house allows the female to easily exit and enter it without damaging the clutch. The disadvantage of such a home for chicks is its entrance. Letok is a hole for entry and exit. It is located quite low, the chicks begin to crawl out of their shelter ahead of schedule.
Vertical house
Vertical houses for parrots are not the best choice. The chicks will not be able to leave the nest early. This is due to the high location of the tap hole. The female, returning to it, can damage the clutch.
Compromise house
The best homemade nesting house for parrots. Why? Because it combines the best aspects of horizontal and vertical houses.
The width of the nest is wide. The female moves calmly in it, without the risk of damaging the clutch. The height of the entrance is optimal so that the chicks cannot leave the house ahead of time. The area of the nesting house allows the babies to grow up in comfortable conditions. They are not cramped; weak and small parrots do not risk being crushed.
Types of nesting houses
There is no need for parrot owners to go into the forest to find a littered, dried tree with a large hollow. A parrot house, practical and safe, can be purchased ready-made or made by yourself.
The choice is between rectangular structures, which differ in the ratio of width, length and height. Each option has its own advantages and disadvantages. The common feature is wood as a material for production and the size of the hole is approximately 50 mm in diameter. The female will be able to expand the cage if necessary. She uses her beak, which she uses to bite off excess wood.
Horizontal design
A parrot house with a width and length of 20x25 cm and a height of 15 cm is called horizontal. The site is quite spacious. It is convenient for the female to hatch eggs and climb into the house without damaging the clutch.
The downside is the following: the height of the house is small, the entrance hole is located very low. Still immature chicks can fall out.
Vertical design
A house with a width and length of 20 cm, a height of 25 cm is called vertical. Little chicks will not get out of the nest ahead of time. But the exit from the house is located at a high altitude. If the female climbs into it carelessly, there is a risk of crushing the eggs or chicks that hatch last.
Compromise option
A compromise solution is the size of the house 25x20 cm, 20 cm high. The area is sufficient for the female to move around. Small parrots will not have the opportunity to accidentally crawl out. A step, which is made at the bottom under a 6x3 cm perch, helps the female to safely settle on the clutch. The chicks will be safe.
How to make a house for budgies
Beginners in breeding parrots have one very important question. How to make a nest for budgies at home? Is this possible, or is it easier to buy (order)?
We recommend reading: Which tree branches can be given to budgies
If desired, everything is possible. You just need to remember that the baby’s home should be made of plywood or wood. Among parrot lovers there is an opinion that the nest can be built from chipboards. Experienced breeders categorically do not recommend doing this, citing the quality of the chipboard.
What is needed to make a house? Material, some tools and patience.
Material
How to make nests from the selected material? Everything is very simple. We cut out several boards, connect them together and secure them inside the cage. This explanation is completely incomprehensible.
It all starts with the choice of material. A wooden nest is the best. The material for it can be an unnecessary wooden box. There is no way to make a shelter out of wood? Then we'll replace it with plywood. We strongly recommend that you refrain from chipboard only.
Design
Before you start making a nest for budgies, you need to know its dimensions.
- The horizontal nesting house is 20 centimeters long. Width - 25 centimeters.
- The vertical nest has exactly opposite dimensions. Length - 25 centimeters, width - 20 centimeters.
- The width of the compromise house is 25*20 centimeters, the height is 20 centimeters.
The dimensions are known, you can start designing. It all starts with drawings of a home made for a budgie. A diagram of the future nest is made. They draw on a sheet of paper, then the details are cut out. And a house is made from them.
The following parts are cut from the selected material:
- Floor.
- Four walls.
- Roof.
They are all connected using nails. You can use self-tapping screws. The roof is secured in such a way that it can be opened in the future. This will make cleaning the nest very easy.
The tap hole is cut out. If you have made a vertical house, the entrance hole is located on its front wall. 5 centimeters retreat from the top edge. Cut a round hole with a diameter of about 4 centimeters. When building a horizontal house, 2 centimeters are retreated from the right wall and a taphole is cut out.
Be sure to insert the perch into the nest. It is located under the entrance. It extends 3 centimeters into the house and protrudes 10 centimeters from the outside. The perch is fixed so that it does not swing from side to side when the bird lands.
How to make a nest for parrots if you have no experience in making it? It's okay, it's easier than it seems. Below is a detailed video describing the process.
Important! To prevent the chicks and the female from suffocating, small holes are made on the sides of the future abode for ventilation. Their diameter varies between 0.8-1 centimeters.
Tool
How to make nests for budgies? For this you will need:
- Self-tapping screws or nails.
- Hammer.
- Wooden perch.
- Cage mounts.
The process of making houses is described above. For those who require a video, please see the section below.
We recommend reading: Colorful Rainbow Budgerigar
Video
It’s quite easy to build a nest for budgies with your own hands. But it’s one thing to explain how to do it. It’s quite another thing to show it clearly. Watch the video on how to create a nesting house. Everything is laid out in detail on it.
DIY nesting house for parrots
Not a single purchased nest can compare in comfort to the one that the owner makes for his pets himself.
In the process of making a nesting structure with his own hands, the owner takes into account all the needs of the parrots, while the creation of store-bought houses is simply a production based on speed, and not on caring for the birds. Making breeding housing for parrots with your own hands is not as difficult as it might seem. The main thing is to follow the recommendations and step by step.
Design and dimensions
Before you start working with materials and creating a nest, you should decide on the type of structure and make a drawing of the future structure on paper. For assembly you will need 7 parts:
- 4 walls;
- floor;
- roof;
- perch.
Each of these structural elements (except for the perch - it is not necessary to make a paper stencil for it) must be drawn on paper. Only after double-checking the dimensions of all the details of the structure can the drawn diagram be transferred to the material from which the birdhouse will be built. To do this, all elements are cut out of paper in natural size, and then drawn on the material using these stencils.
Drawing of a nest made of wood.
The table below shows the parameters of the structures.
| Type of nesting structure | Width | Length | Height | Letok (size and location) | perch |
| Horizontal | 25 cm | 20 cm | 15 cm | 4.5 cm in diameter; at a distance of 2-3 cm from the top and one of the side edges of the structure | Does not go inside the structure and protrudes outward by 10 cm |
| Vertical | 20 cm | 20 cm | 25 cm | 4.5 cm in diameter; 3-5 cm below the top edge of the structure | Going inside by 3 cm and sticking out outside by 10 cm |
| Compromise | 25 cm | 20 cm | 20 cm | 5 cm in diameter; at a distance of 3-4 cm from the top and one of the side faces of the structure | Protruding inward by 3 cm and protruding outward by 10 cm |
Tools and materials
When working you will need:
- material of manufacture;
- ruler or tape measure;
- a simple pencil;
- compass;
- saw, jigsaw or hacksaw;
- nails or screws;
- hammer or screwdriver;
- metal fastenings - hooks or brackets (for fixing the house on the bars of the cage).
One of the most important nuances is the choice of material. Experienced parrot breeders do not recommend using the following materials to make a nesting house:
- chipboard;
- plywood;
- plastic;
- cardboard.
Nest placement option. The best houses are those made from natural wood. To cut out structural elements, wooden boards that have not undergone any chemical treatment are used. It is recommended to choose boards from deciduous trees - coniferous wood contains resins that are harmful to the body of birds.
To make the parrots’ nest cozy and warm, boards for various parts should be selected with the following thickness:
- for walls and roof - 2 cm;
- for the bottom - 3-4 cm.
This thickness of the structural elements will allow temperature and humidity levels to remain inside the structure at an optimal level.
Manufacturing process
When the drawing of the parts is made, and the material and tools are prepared, you can begin manufacturing. The whole process takes about 1 hour. Step-by-step procedure:
Cut out 7 structural parts from the selected material (according to the drawing transferred to it) - 4 walls, a roof, a floor and a perch. Draw a circle on the front wall with a compass - this will be the tap hole. Draw another small circle a little lower to secure the perch. Cut both holes. Make 3-4 holes in the side walls for ventilation - each 1 cm in diameter. On the bottom with a slope to the right or left, use a compass to draw a circle with a diameter of 5-8 cm. Cut out this circle and attach it to the same place, but so that the result is a small depression (about 1.5 cm). This will be the laying site - this is where the female will place her eggs. Connect the walls using nails or self-tapping screws. Secure the bottom so that the recess for masonry is removed from the tap hole. Attach the cover. It must be opening - removable or folding. This is necessary both for cleaning and for monitoring the condition of the masonry and newborns. Insert the perch into the prepared hole under the taphole
It is important to make sure that it does not wobble - the thickness of the perch and the diameter of the hole must match. Install fasteners on the top edge of the structure. Scald the finished nest with boiling water for disinfection and dry completely.
You can move on to the next stage - internal arrangement.
House from a pet store: pros and cons
It is much easier to buy a parrot house at a pet store than to bother making one. So it seems. There are advantages to such a purchase: you don’t have to waste time and nerves on building your own home.
The purchased nesting house has much more disadvantages than advantages:
- The material from which it is made. This is chipboard, rarely plywood. There are wooden nests on sale, but their price range is high.
- The house is glued together. What is in the glue is known to the manufacturer. There is no guarantee that it is safe for the health of parrots.
- The thickness of the walls and floor of the house purchased at the pet store is 1 centimeter. Such a nest, especially one made of chipboard, is very cold.
Custom nesting house: pros and cons
If the owner of parrots has absolutely no time to figure out how nests are made, you can try making a custom-made house.
Advantages of this work:
- All client wishes are taken into account.
- Deadlines are discussed individually.
- Quality of work.
The disadvantages are the following:
- It's difficult to find a master.
- The required material may not be available. You'll have to buy it yourself.
- The production time is quite long.
- Cost of work.
When and where to place a nest
As soon as the owner of the parrots notices that the couple is beginning mating games, you can think about a nesting house.
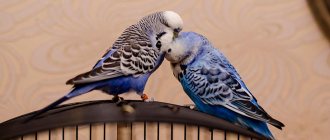
What are mating games? This is the period when the male is actively courting his girlfriend. She reciprocates his feelings. The birds pluck each other's feathers, chirp for a long time, as if talking, and kiss. Then the nest is placed in the cage. His female will immediately begin to settle down if she is ready to breed.
A breeding house for budgies is set up in two ways. Outside the cage or inside. The first is used in case of small cell sizes. The second option is the most optimal. The nest is attached to the rods. To place the nest inside the cage, it is desirable to have two doors. On one of them they attach the house. A homemade nest for budgies needs proper care.
What a perfect nest it is
The best materials for making a bird house (box) are wooden plywood, board or chipboard. You will need four planks for the walls, as well as a pair for the floor and ceiling. In one of the boards it is necessary to make a hole for the entry of birds (entry), the diameter of which should be at least four centimeters (like a small mirror).
The socket does not require additional lighting, which means that it does not need to be equipped with lamps. Do not place the cage with the box in a draft or in the cold, as the birds may catch a cold.
A do-it-yourself nest can be of three types: vertical, horizontal or combined.
Important: adult birds do not live in the nest, but only hatch eggs there!
House dimensions
For both vertical and horizontal houses, you should take boards measuring 20*25 cm. In a vertical house, the height will be 25 cm and the length will be 20 cm. In a horizontal house, the opposite will be true. A perch should be fixed under the entrance, one edge of which will protrude outward by 10 cm and inward by 3 cm.
We should also not forget about ventilation, the role of which in this case is played by small holes with a diameter of 0.8-1 cm on the sides of the box. It should be attached directly to the cage next to the mirror using brackets.
Ready-made nest made of wooden blocks
In a vertical house, the entrance is located on the front wall in the middle, like a mirror on the wall, and you should retreat 3 cm from the top edge. Such a nest has one drawback, which is the likelihood of the female damaging the eggs lying there.
The design of a horizontal house better ensures the safety of eggs. To prevent the female from clinging to them at the entrance, a step is made inside under the perch. The entrance here is located in the side part. Through it, the grown chicks will later be able to observe their environment as if through a mirror.
Horizontal nests made of fiberboard
Combined houses for parrots combine the advantages of both types and are the most optimal option for chicks to live in. It is spacious and comfortable enough for hatching eggs, which remain safe until the chicks hatch.
It is best to place the box with the cage where there will be no unnecessary fuss. This can be a room or any other room without bright light, lamps and crowds of people and animals. By the way, parrots can look after each other even in a cage with a large number of birds. But when the female is fertilized, she needs privacy. At this time, it is necessary to resettle her from the “neighbors”, ensuring peace and quiet.
From May to September, the cage and box can be kept in the fresh air. When it is cool, it is better to bring the nest indoors. If fertilization occurred during the cold season, then you just need to ventilate the room with the house from time to time.
Nest house care
Now everyone knows how to make a house for parrots with their own hands. How to care for your work of art and its inhabitants?
The cage with the nest is placed in a warm room. Budgerigars are afraid of drafts, and chicks even more so. The female and the baby should be protected from cold and noise. The less people visit the room in which the cage is located, the calmer it will be for the “young mother”. Otherwise, the parents are capable of abandoning the chicks.
Birds cannot tolerate tobacco smoke. Smoking is prohibited in an apartment where budgies live. At the time of their breeding, it is strictly prohibited.
We recommend reading: Causes and treatment of diarrhea in budgies
Before placing the nest in the cage, it should be completely scalded with boiling water. Let dry or blow dry. Is the house completely dry? You can safely attach it to the cage.
Breeders recommend sprinkling the bottom of the nest with sawdust. They should be medium in size. Too small ones risk ending up in the female’s stomach. Such a dinner will not end well. Sawdust is needed to keep the chicks warm. And for easier nest cleaning. Add a teaspoon of medicinal chamomile flowers to them. Chamomile is bought at the pharmacy and used as an antiparasitic for birds.
There is no need to install any additional lamps in the socket. The female herself will warm the offspring. If the birds decide to breed in the cold season, then an ordinary table lamp is attached to the outside of the cage. It is useful for parents as a source of additional heat.
The nest must be cleaned every week. But how to do this when his parents actively protect him? They rush at the owner, scream threateningly and try to peck. In that case, leave them alone.
When the female and male are less aggressive, they allow the owner to access the nest. They do it reluctantly, but they endure. Then, letting the birds fly, they use this time to clean the nest. The babies are carefully removed, the old sawdust with droppings and other “joys” of parrot life are cleaned out. Fresh sawdust mixed with chamomile is poured in. The chicks are placed in the nest. All this needs to be done quickly so that the parents do not get agitated and attack the owner.
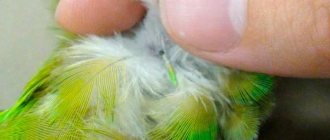
Attention! Have you noticed any droppings stuck to the chick's foot? Rinse it off gently with warm water.