Home » Useful Information
When a furry pet is sick, all family members worry about him. A large number of manipulations of various types can turn any owner into a “cat nurse.” The most difficult stages of treatment must be left to specialists. But when the pet is on the mend, and some procedures are still needed, the owners are quite capable of carrying them out themselves. One of them is a dropper at the withers.
- 2 How to correctly place an IV in a cat’s withers
2.1 Video: hypodermic drips for animals
- 3.1 Possible errors
What is a subcutaneous drip
In veterinary medicine, a drip is called infusion therapy. A special system is used to administer the drug in solution form.
It consists of the following parts:
- a needle for taking medicine from a bottle;
- storage tank;
- long PVC tube;
- roller clamp to regulate the speed of solution infusion;
- needle for insertion into a vein.
If the animal is facing a long course of treatment, then installing a catheter for the cat at home will eliminate the need to insert a needle into a vein every day. Then the pet will not experience pain during the procedure.
Installing an IV for a cat
The basic rule for installing an IV, as with any other medical intervention, is thoughtfulness and sterility.
To fulfill the first rule, determine in advance the location of the procedure: a table with a bedding must be prepared in the room on which you will fix the pet; you need good lighting and an object such as a mop or cabinet handle, located at a height of 40–50 centimeters from the table, to secure the solution . In addition, it is necessary to ensure the optimal temperature of the solution. If for some reason there is no time to warm it up, after collecting the dropper, provide a deep plate with hot water through which the system tube will pass, then the drug will warm up a little before infusion. During the entire administration process, it is necessary to keep the cat under supervision, it is necessary to select the desired speed of administration of the solution and to prevent air from entering the dropper tube.
To maintain sterility, you need to wash your hands with soap and water up to the middle of the elbow, put on disposable gloves and invite an assistant to help.
Remain calm during the procedure: the owner’s feelings are transmitted to the cat.
Preparation for the procedure
To install a dropper you will need:
- medicinal product;
- tripod for fixing the bottle. Can be replaced with a pendant made from a plastic bag or bandage;
- disposable syringe;
- system for intravenous infusions (infusions);
- alcohol and cotton wool.
When all the components are collected, you can proceed directly to the procedure:
- Remove the protective cap from the lid of the medicine bottle.
- Turn it over and fix it at a height of 40–50 centimeters above the intended location of the patient.
- Treat the rubber stopper on the bottle cap with alcohol.
The intravenous infusion system consists of a needle for connection to a bottle or plastic bag with solution, a dropper, an injection rate regulator, a unit for additional injections and a needle
- Assemble the system: Lower the injection speed control wheel all the way down.
- Insert the punch into the rubber stopper on the lid of the medication bottle.
- Nearby, insert a needle from a disposable syringe or for intravenous injections, which comes with the system if the liquid will be administered through a catheter. This is necessary for air circulation.
- Press the plastic container under the punch 2-3 times. Liquid should drip from the bottle. Wait until the container is half full.
- Slowly lift the dispenser ring (speed control wheel), watching as the liquid fills the tube. The goal is to prevent air from entering.
- Follow the entire path of the liquid through the tube until it begins to pour out.
- Close the dispenser and check the system for air bubbles.
- If there are bubbles, open the dispenser again and drain the solution until they are destroyed.
- Insert the free end of the dropper into the needle that is already in the cap of the bottle. The dropper can be left in this form until the procedure begins.
Further actions depend on whether a catheter will be used to administer the medicine or not.
Video: how to assemble a dropper
Inserting an IV using a catheter
To connect an IV to a catheter in an animal's vein, follow these steps:
- With the help of an assistant, place the animal on the table, calm it down, secure it by wrapping it with pre-prepared bedding.
- Clean the outer parts of the catheter with cotton wool soaked in alcohol.
- Fill the syringe with 2 ml of saline solution.
- Remove the protective cap from the middle port of the catheter.
- Insert a syringe without a needle into it and inject the solution. A small amount of solution should remain in the syringe to prevent air bubbles from entering the vein. Further actions depend on how well the solution flows: If the usual force when pressing the syringe plunger is not enough, then a blood clot has formed in the catheter. Try to dissolve it by introducing a mixture of heparin and saline into the upper port in a ratio of 0.1 ml of the former to 1 ml of the latter. Repeat the injection of the solution through the middle port. If everything is still the same, then it is best to contact your veterinarian to replace the catheter.
- If the solution goes well, you can continue the procedure.
Video: how to connect the system to a catheter
Installing an IV without using a catheter
To install an IV without using a catheter, follow these steps:
- With the help of an assistant, place the animal on the table, calm it down, secure it by wrapping it with pre-prepared bedding.
- Shave the fur on the paw at the fold and slightly below.
- Wrap the paw tightly above the fold with a tourniquet or bandage. Wait for the vein to swell.
- Insert an intravenous needle parallel to the paw. Better than the butterfly type.
The butterfly uses a very thin needle, which will reduce the likelihood of injury to the vein
- Remove the clamp or bandage. If everything is done correctly, blood will begin to drip from the end of the needle.
- Open the dropper with the wheel and watch the speed at which drops appear in the plastic container. It should be 1-2 drops per second, depending on the density of the solution; the higher it is, the slower the liquid needs to drip.
- Secure the needle with an adhesive tape at a distance of a centimeter from the injection site.
- If you need to add another drug, fill the syringe with it and inject the medicine into the elastic band (node for additional injections).
Completing the procedure
When the liquid begins to flow through the system tube or the required amount remains in the bottle, close the dropper with the wheel and perform the following steps:
- with a catheter installed, remove the system from it. Close the middle port of the catheter with a clean stopper, and drop a mixture of heparin and saline into the top port (drawn into a syringe at the rate of 5 ml of 0.5 ml of heparin per 4.5 ml of saline) to prevent the formation of blood clots. Bandage the catheter and secure the bandage with a bandage;
- if there is no catheter, peel off the plaster securing the tube with the needle, apply a cotton swab soaked in alcohol to the puncture site and remove the needle. Bandage or secure the area with a bandage.
Indications for subcutaneous infusion
A cat drip is prescribed to cleanse the body of harmful substances or for viral infections. If you need to quickly replenish your supply of vitamins, your veterinarian may prescribe intravenous injections.
Subcutaneous drips for cats are indicated in the following cases:
- in case of poisoning;
- for dehydration, which may be caused by prolonged vomiting or diarrhea;
- with renal failure;
- to eliminate vitamin deficiency;
- as maintenance therapy for complex treatment.
You cannot choose medications for injections and drips on your own. Both an adult animal and a kitten should only be prescribed treatment by a veterinarian.
Important! There are drugs that cannot be injected under the skin or into a muscle; they can only be injected into a vein.
Reasons for prescribing an IV
A doctor may prescribe subcutaneous drips for a cat for various health problems. The most important of them include :
- Dehydration that occurs due to diarrhea, vomiting or fever.
- Starvation. If a cat refuses to eat, it is necessary to somehow maintain its vitality. To do this, a glucose solution is injected subcutaneously, which supplies the necessary microelements to the body.
- The need to remove toxins from the cat’s body.
- The need to restore the pet’s health after an illness.
- Presence of renal failure.
How to place subcutaneous IVs correctly
Inserting a subcutaneous drip into a cat is not at all difficult. It will be much more difficult to give an injection into a child’s vein. This mechanism is completely simple and takes place in several stages:
- It is necessary to secure the pet so that it does not inadvertently injure itself, and you will be able to inject the required dose of the drug. With this you will be helped by retainer bags that are designed specifically for such situations.
- Once you have prepared your pet, you should take up the IV. The receiver pierces the bottle cap and releases it from air. To do this, drain a little solution. Then you need to shut off the system and make sure that the needle is well secured.
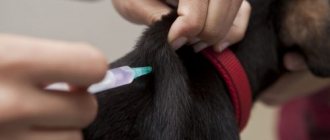
- Let's move on to vaccination. It is necessary to drip the solution into the withers area or the area of the inguinal fold. The skin is collected by hand to form a triangle, a needle is inserted into its base.
- Let's open the system. You don’t have to worry about the speed at which the drug is administered, because even if you open the dropper completely, the solution will still be absorbed into the blood only after some time. Therefore, there is no point in extending this procedure over the whole day.
- And finally the final stage. After all the liquid has been poured in, the dropper is closed, the needle is removed, and the injection site is pressed with a finger so that the liquid does not splash out. If you fulfill all these conditions, you will not have any problems.
However, do not be alarmed if the solution does not flow in, but hardens in place. Take it, just gather the skin into a fold and hold it until the bottle is empty.
© shutterstock
You shouldn’t worry about the soft lump that forms in your cat after subcutaneous drips. As a rule, it resolves within two hours. But there are exceptions when this happens within 8 hours.
What solutions can be administered and in what dose
To properly administer an IV to a cat at home, the dosage and type of drug are calculated based on the weight and age of the cat, as well as taking into account the complexity and nature of the disease.
Types of drugs that are prescribed for a cat's IV:
- vitamins;
- saline solution (sodium chloride, warm);
- anti-intoxication drugs;
- antibiotics;
- glucose 5%;
- Ringer's solution.
Important! The volume of fluid for intravenous administration to a cat at home should not exceed 50 ml per 1 kg of animal weight. For example, saline solution is administered 20-30 ml at a time, but with intense loss of fluid, the dose can be increased.
General information
An IV should be placed in case of severe dehydration, poisoning, or when the animal suffers from kidney failure. The procedure helps restore the water-salt ratio of the fluid. In other situations, cats who are recovering need an IV, but IVs still need to be installed. The distance from the veterinary institution is one of the reasons why she has to carry out the procedure herself.
Important to remember! Neither a video nor a clear algorithm of actions replaces practice and experience. The system should be installed only in a situation where it is the only chance for recovery and there are no other options. For prudent owners, it is better to be present at the veterinary institution once or twice during the placement of an IV and see what nuances there are.
Most cases are treated with an injection of medicine into the withers. A poorly prepared person may not get into this zone - then it is easier to install a drip system. For a small cat's paw, it is convenient to use a butterfly - a needle with a small size and plastic wings that ensure reliable fixation to the limb. The bag or bottle with the medicine is located above the animal at a height of 40 to 50 cm; it can be hung by placing it in a T-shirt bag, tying the ends and securing it in a suitable place. Each drip set has a chamber that separates the oxygen from the liquid; infusion bag (a needle for inserting into a container with a solution); dispenser with a slider for adjusting the infusion of flow (can be jet or drip); rubber conductive hose; cannulas (for additional administration of drugs).
Place of introduction and fixation of the animal
First you need to choose a place in the apartment that will be convenient for both the owners and the cat. A table top or stable ironing board works best. The animal is placed on a blanket or soft diaper.
If you don’t have a special cat bag at home to secure your pet, you can wrap it in a soft blanket and gently hold it during the procedure.
It is best to put IVs on a cat at home with an assistant, then one person will hold the animal, and the second will administer the drug.
How to give a cat a pill
Sometimes it is not possible to give the animal an intravenous or subcutaneous drip. In this case, they resort to treatment with tablets or powders. How to get a cat or dog to eat a pill?
The easiest way to give a cat a pill is using a special syringe.
There are three effective ways to give your pet the drug:
- Secure the animal (you can wrap it in a thick robe or large towel to prevent it from escaping). Open his mouth and quickly place the tablet on the root of his tongue with your finger. After this, close the cat's mouth and blow into its nose - this will trigger a swallowing reflex.
- Grind the tablet into powder and mix it with half a teaspoon of sour cream or soft cottage cheese. You can add the drug to minced meat or other food that your cat loves. Offer the medicinal mixture to your pet.
- There are special syringes on sale that allow you to give your animal a pill quickly and painlessly.
Every cat owner should have an understanding of how intravenous catheters are installed and an IV is placed. After all, sometimes your pet needs help immediately, but there is no veterinarian nearby. Timely intravenous or subcutaneous infusions can save a cat's life.
System assembly
The drip system is assembled according to the following instructions:
- Open the package.
- Close the roller clamp by moving it down.
- Remove the protective cap from the needle and immediately insert it into the bottle of medicine, piercing the rubber stopper. The needle must be inserted all the way until it stops.
- Then you should place the container with the drug 30-40 cm above the level of the surface on which the cat is lying. If the medicine bottle is located lower, the solution will not flow into the vein or muscle.
- Using your thumb and forefinger, press the area under the needle. The drug should fill part of the tube.
- To release the air lock, you need to open the roller clamp until the solution begins to drip from the system.
Rules for installing a catheter at home
A catheter is a very convenient device that can be installed in a pet’s vein for several days (up to 5 days) and provide painless intravenous infusions. It consists of a flexible thin tube into which a needle is inserted, plastic wings with a valve for attaching to the paw and administering drugs, a cannula and a cap.
They come in several sizes, but cats are usually fitted with blue (22G, 0.9mm diameter, 25mm length) or pink (24G, 1.1mm diameter, 33mm length). Do not confuse bladder catheters with intravenous catheters.
Before installation, you need to prepare everything you need: an adhesive plaster, several sterile catheters in a package, cotton balls soaked in alcohol, a tourniquet, scissors, a bandage (it is more convenient to use self-adhesive bitter).
Preparing the site for catheterization and inserting the catheter
The procedure algorithm is as follows:
- The cat is well fixed (it is better if you have an assistant), and the area on the front paw where the catheter will be installed is shaved.
- A tourniquet is applied to the limb (just above the hock) and the distended vein is found by palpation.
- The shaved area for catheterization is treated with a cotton swab containing alcohol or an antiseptic.
- The catheter is removed from the package and carefully inserted into the vein at a slight angle (no more than 15 degrees).
- As soon as blood appears in the catheter, the angle of the needle is reduced and it is inserted a little deeper into the vein.
- Then the needle is carefully removed, having previously clamped the vein, and the catheter with the tube, on the contrary, is inserted into the blood vessel almost all the way.
- A sterile cap is screwed onto the cannula.
- The catheter is fixed to the paw with a thin adhesive tape (care must be taken that it is not tightened too tightly, otherwise it will cause swelling).
After proper installation, you can connect the system and begin intravenous infusion.
How to properly remove
After 5 days have passed since installation, the catheter must be removed. The procedure is also carried out in cases where the animal has injured it or its paw is swollen.
It is not difficult to remove: the adhesive plaster is carefully cut near the wings and peeled off from the fur. A cotton swab with an antiseptic is applied to the site where the tube enters the vein, and the catheter is carefully removed. A bandage with a sterile napkin is applied to the paw for an hour.
Administration of the drug
Cats are given an IV at home according to the following scheme:
- The pet is placed on its side.
- The needle is inserted under the skin on the paw, at the withers or in the thigh area, where regular injections are given.
- Then you need to unscrew the catheter cap and attach the IV cannula, without a needle.
- Open the clamp and start the installed dropper. The delivery rate of the drug should be no more than 20 drops per minute.
- At the end of the procedure, you need to tighten the roller clamp, disconnect the cannula and close the catheter with a cap. At the end of the procedure, the catheter is washed with saline and tightly fixed with a bandage.

