The natural reflex of cats to lick their wounds in some situations harms them. Although this unique method of disinfection helps animals survive in the wild, it is not suitable for pets. There are more effective methods for disinfecting and healing wounds. But measures must be taken to prevent scratching and biting, which interfere with recovery. If you can protect a dog with a muzzle, then a veterinary collar will help a cat.
What is a protective collar for a cat?
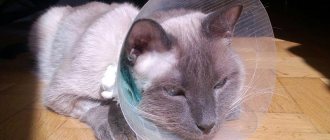
A cat collar is usually referred to as a cone-shaped design. Other names are simpler - cone or cap. The design is made of durable material, narrowed on one side and larger in diameter on the other. This accessory is a popular tool in animal therapy using barrier structures.
A cat in protection will not be able to scratch unhealed wounds
The cap is used to protect and restrict access of a kitten or adult cat to areas of the body in the following cases:
- rehabilitation after castration;
- surgical interventions;
- processing wool with chemicals;
- recovery after abdominal surgery.
In all of these situations, the animal should not have even the slightest chance of scratching or gnawing wounds, or licking fur treated with chemicals. The main purpose of the barrier is to protect the animal and prevent it from harming itself.
When to use
Initially, the veterinary collar was a post-operative accessory, but the scope of the protective collar for cats has expanded over time. This means of barrier therapy is used both in a hospital hospital setting and at home.
When to use a collar
- After castration and sterilization operations, so that the animal does not lick the stitches, irritating the wound.
- After treating open wounds with ointments and powders to prevent the animal from licking them.
- During the course of treatment for ear mites, prevent your pet from scratching its ears.
- After treating the animal’s coat with antiparasitic agents: sprays, drops, shampoos. The cat will not be able to lick off the harmful medicine.
- If your pet is sick with lichen or another fungal disease and needs to treat the affected areas with antifungal ointments.
- After a fight or injury, if the cat needs treatment for scratches and wounds.
- In the postoperative period - after any abdominal surgery, injuries of the limbs and spine, traumatic brain injuries.
- During the treatment of allergic and infectious skin diseases.
- After eye surgery and time of treatment of ophthalmological diseases.
Why do you need a veterinary collar for cats?
This barrier protection product performs the following functions:
- Prevents the cat from removing post-operative dressings.
- Protects seams and open wounds from infection and injury.
- Allows medications (ointments, drops, powders) to be absorbed.
- Protects fastenings of metal structures in case of limb fractures.
- Prevents the licking of toxic medications (anti-parasitic drops).
- Protects the cat's head from scratches and scratches.
- Does not allow the bandage to be torn off from the head and eyes.
How long should you wear the collar?
The cat cone is used as prescribed by a veterinarian and is not removed from the animal until the wound has completely healed. Depending on the severity of the wound, the wearing period can range from several days to several weeks. During this period of time, the animal should not be allowed outside.
Wearing a special collar increases the effectiveness of many therapeutic measures and promotes a speedy recovery of the cat in the postoperative period.
In what cases is protection not needed?
House for a cat: options for how to make it yourself
Freedom-loving animals have difficulty accepting a new wardrobe item. Therefore, if the pet cannot calm down, the veterinary cap will have to be removed.
There are times when completely getting rid of an accessory that is unpleasant for an animal is simply dangerous for its health. In such cases, it is necessary to replace the barrier structure with a bandage that is tied on the back. Animals perceive such a unique T-shirt more calmly.
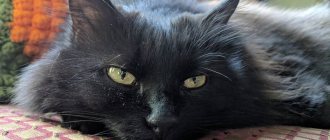
A cat wearing a bandage feels more confident
Where can I get a protective collar for an animal?
Today, pet stores offer such a variety of products that purchasing a protective collar for a cat or dog is not difficult. However, in some cases, you may simply not have time to run around shopping. A limiting device may be needed suddenly. However, there is nothing wrong with that. Let's look at how to make an Elizabethan collar yourself. The simplest options presented below can be used in an extreme situation. But if you take care of everything in advance, this simple accessory will even add attractiveness to your animal.
To make a veterinary collar for a cat or dog, you can use:
- plastic bottle of the required volume;
- thick cardboard;
- foam;
- durable and thick fabric (such as felt);
- other available materials.
What to look for when choosing
A veterinary accessory significantly complicates the life of an animal, so its choice should be taken with full responsibility. Choosing a veterinary collar for a cat is quite difficult, since you need to take into account many nuances.
Do-it-yourself collar for a dog after surgery
The part of the product adjacent to the neck should be soft, ideally covered with fabric. The height of the cone should not be too high so as not to interfere with the view. However, a low one will not work, otherwise it will lose its functionality.
Additional Information! Size is the most important criterion. The kitten should not remove the product easily. But it is worth considering that a narrow collar will put pressure on the neck. A product that holds its shape well is considered good.
Requirements for the shape and quality of the collar
If you need to put a high collar on your cat to protect its health, it is important to choose the right design for the size of the animal. The collar must be safe and reliable. The pet should not be able to independently remove this structure or break it with its paws. It is also important that the cat collar does not interfere with free breathing or rub the skin of the neck. Before releasing a cat with this design, you need to carefully check the edges of the product so that they do not cut you.
You can select and buy a plastic collar for rehabilitation after surgery at a pet store, but the designs do not always meet the required parameters. Therefore, often the best solution is to make a product for your cat yourself. For this, a ready-made pattern is used, which is not difficult to find on the Internet.
The veterinary collar is made not only from plastic, but also from paper. For cats of gentle and calm breeds, you can use dense fabric that is folded in several layers.
Size chart of protective collars for cats - table
The big advantage of this category of veterinary product is that it can be selected in size according to the parameters of the animal. The following table will help you buy the right barrier cap:
How to make a house for a cat with your own hands: patterns
| Neck circumference (cm) | Collar height (cm) | Marking number |
| 22-25 | 7 | 7 |
| 22-25 | 10 | 10 |
| 28-33 | 12 | 12 |
| 31-38 | 15 | 15 |
| 38-44 | 20 | 20 |
| 44-50 | 25 | 25 |
| 47-57 | 30 | 30 |
This information is very helpful when purchasing a barrier for your furry friend.
The main thing is to take measurements of your pet correctly. For your information! A cat collar can be made from cardboard, plastic, fabric and other materials. Each of them has its own pros and cons.
Historical excursion
Why did the protective veterinary collar receive such an interesting name? The fact is that in the 60s of the twentieth century, veterinarian Frank L. Johnson noticed an interesting similarity. The barrier structure that prevents the animal from reaching the wound is very similar to the collars of the dresses of the ladies of the court during the time of Queen Elizabeth of England.
Puffy starched collars were very popular at that time. They came to England from Spanish fashion and were tight, starched structures with numerous folds. They were not sewn onto the suit, but were put on over it and tied tightly.
By the end of the 16th century, collars had reached incredible sizes. The width of about 30 cm greatly limited the view and made it difficult to turn the head.
How to make a fabric collar
When it is not possible to buy a barrier structure, it can be made from a comfortable collar and scrap materials that you have at home. There is nothing complicated about this. It is enough to follow the step-by-step instructions, and then everyone will be able to cope with this task.
Made from soft fabric
It is important to take care of the animal's comfort. A veterinary cap made of fabric is considered the most convenient. When wearing it on the neck there is practically no load. It does not bother the cat, adapting well to its body.
Such a cone is sewn from natural fabrics such as linen or cotton. The pattern is outlined on the fabric and the blank is cut out, and then all the parts are sewn together.
Important! Fabric products do not hold their shape well. To make them stronger and more stable, plastic or plastic stands are used. Or you can simply fold the fabric in several layers.
The fabric collar does not put pressure on the pet's neck
Made from thick fabric
The product is made according to the same principle as in the previous version. Just choose a denser fabric - non-woven fabric, felt. Dense material holds its shape better, so one layer will be enough to make a high-quality barrier.
Feature of the pattern
When making a protective cap for a cat yourself, you will have to prepare a pattern. It looks like a half ring.
The collar should not interfere with the pet’s view, so before starting work it is necessary to measure the circumference of the neck, which will correspond to the length of the inner line of the semi-ring. The length of the pattern should be with a margin of 2 cm.
The collar pattern is very simple
What is an Elizabethan collar and why is it needed?
The Elizabethan collar is a post-operative accessory , but it is also used for other purposes. For example, with many skin diseases it is contraindicated to wet the skin, and the cat may lick it. With ear mites, pets scratch their heads vigorously, and the collar will prevent this from happening. Cats really don’t like bandages and do their best to remove them. To untie the knots, the pet usually uses its teeth, but if there is a collar, it will not work.
Important! If the veterinarian has prescribed the wearing of an Elizabethan collar, this recommendation should be heeded.
You won't be able to watch your cat every second. Even if you take a vacation from work, you will have to sleep... and what will your ward do during this time? That's right, scratch, lick, remove bandages or blankets, etc.
The Elizabethan collar has grooves into which the collar is threaded. Some models are secured with ties or drawstrings, which is not entirely suitable for temperamental animals. It must be taken into account that when wearing a collar, the cat should be able to take food and water, that is, its brim should not be too long . If your pet declares a boycott, then the collar will have to be removed while taking food and water, naturally, under your strict supervision.
Be sure that your pet will be unhappy with the collar. For a while he will move strangely and look at you pleadingly. Don’t give in, most cats quickly get used to the accessory, and if the pet is too persistent, check if the collar is rubbing.
Where can I get an Elizabethan collar? Buy or make. Most factory models are made in a wide size range. More expensive accessories have Velcro, fabric edging or are made of soft material so that the cat can sleep comfortably.
This is interesting! The Elizabethan collar was invented in the 60s of the 20th century. The name of the accessory is directly related to the reign of Elizabeth I (Queen of England), when it was fashionable to wear puffy, cone-shaped collars.
When should you use an Elizabethan collar?
The Elizabethan collar is widely used in veterinary medicine not only for cats, but also for dogs. Wearing such an accessory is important if your pet:
- You have been injured and it is important to stay clean and dry to heal.
- Treatment of wounds with ointments, which should remain on the skin until completely absorbed.
- Recovering after abdominal surgery, that is, when the sutures must remain intact and dry.
- Got a fungal infection of the skin or subcutaneous parasites - to protect against scratching.
- Returns to normal condition after castration or sterilization.
The Elizabethan collar is primarily about the safety of your pet . Yes, perhaps it is not comfortable and looks strange, but it is only needed for a short period. Without a collar, a cat can significantly complicate its condition. There are cases when quadrupeds had stitches removed after abdominal operations on the abdominal cavity (along the white line), followed by repeated anesthesia, suturing and the threat of peritonitis.
Very often, owners ignore the recommendation to wear an Elizabethan collar after castration. This should not be done, since a cat's tongue is rough and irritates damaged skin. The cat will lick the affected area after using the toilet and at any convenient time. Even if the pet does not chew the stitches, the skin becomes thinner from licking, and the threads tear the skin.
Tip: use an Elizabethan collar to treat your cat against blood-sucking parasites or after bathing in insecticides. Most of these products are safe only after drying, and the collar will prevent the cat from licking himself while the fur is wet.
DIY Elizabethan cat collar made from cardboard
This design provides assistance during the rehabilitation of pets after operations. The main thing to consider is that the collar should be comfortable.
If it is not possible to buy a suitable accessory, then the most affordable option would be a homemade cardboard collar. You can use any cardboard box from which 2 semicircles are cut out, the inner diameter of which should be the length of the collar. Then use tape to connect both parts.
The collar is attached to the collar. In order not to spoil it, you need to put a cover on the collar and sew a cone-shaped protection to the cover.
When should you use an Elizabethan collar?
Such a device may be needed when not the most pleasant events happen to your cat, these could be:
- wound;
- surgical sutures;
- scratched wounds;
- castration;
- other skin damage.
For example, you need to apply ointment and a bandage to the damaged area, and to prevent the cat from licking it off, we put on a so-called Elizabethan collar. It ensures your pet a complete and safe recovery. You can buy it at any pet store or make it yourself.
Tip: use an Elizabethan collar to treat your cat against blood-sucking parasites or after bathing in insecticides. Most of these products are safe only after drying, and the collar will prevent the cat from licking himself while the fur is wet.
How to make a cat collar with your own hands from a plastic bottle
The main condition for high-quality production of a bottle collar is the correct size. In most cases, a two-liter bottle will do. Manufacturing process:
- On the neck of the bottle, select a place with a diameter suitable for the cat’s neck.
- From this line the height of the collar is measured and all excess is cut off.
- A vertical cut is made and holes for lacing are made on each side.
- The holes are treated so that they do not injure the animal. For example, you can heat them with a candle so that the edges melt and become less sharp.
- Pull the lace through the holes.
- Improve the quality of the accessory by attaching a case with loops for the collar.
Important! The animal should be comfortable. Therefore, you need to regularly check that the cone does not press or rub your neck.
A plastic bottle as a collar is the most economical option
We use lightweight plastic
The easiest way to make a protective collar is from a regular plastic stationery folder. If you cut it from the bottom and along one of the end sides, you will get a fairly long, wide and very flexible plastic sheet. In addition, you will find it useful:
- sharp scissors;
- tape measure;
- calculator;
- stapler with strong and wide staples;
- wide fabric-based patch, adhesive tape or regular tape.
For cutting you will need only 2 sizes:
- length of the animal's head from nose to neck;
- neck girth.
Other options for homemade cat collars
There are many other options for making safety collars. One of the most popular and simple models is a foam cone. A ring is cut out of a sheet of foam rubber. The thickness of the ring should be no more than 2 cm and the diameter 30 cm.
You can also make your own cat collar from a plastic or paper plate. A circle is cut out in the center 1 cm larger than the diameter of the neck. The inside is glued with fabric to prevent injury from the sharp edge. The product is put on the cat and the incision site is sealed with tape.
Important! Homemade structures are more suitable for short-term restriction of movement, since they are not very durable.
Made of plastic
If your cat is restless and persistent, then in the postoperative period it is better to use a more rigid structure. To make a hard cat collar with your own hands, it is advisable to use flexible plastic.
To simplify the task, use this pattern as a basis. It is better to first print it on a printer and then transfer it to plastic.
If you have a large bottle with smooth walls at your disposal, then it is quite possible that you can get the required piece from it. You just need to attach the printed pattern to the surface and trace along the contour.
The numbers in the photo indicate: 1 – straps for covering the collar, 2 and 4 – places of sharp edges of the product, 3 – clasp.
To assemble the structure, all that remains is to bend three radial strips in half. Then you need to pass a collar or harness through them. The longest strip is used to join the edges. It just needs to be launched through the slots.
Important point! The main condition when creating such a collar is to reduce the risk of injury. The edges should not be sharp, otherwise they will hurt or cause chafing on the cat's delicate skin. It is better to frame them with tape or a fabric strip.
Another interesting, but at the same time quite simple to implement, manufacturing option based on a stationery folder is described in detail in the video clip:
If you wish, you can limit yourself to the very option of making a collar for cats, which is not difficult to make with your own hands from a bottle.
The basis for production was a plastic bottle. The neck was cut off and the sharp edges were sealed with tape. Holes were made in four places at equidistant distances, into which ropes were inserted to secure them to the collar.
Note! To prevent chafing, there should be a finger-thick gap between the collar and your pet's neck. Too large a gap is also bad, because with its help the cat can easily remove the collar with its hind paws.
Even if your pet has a calm disposition, fixing the collar is mandatory. As an alternative to taping, the sharp edges can simply be melted off. A visual inspection will help determine the need for additional insulation of areas adjacent to the wool. Redness may begin to appear within 20-40 minutes from the moment of putting it on.
How to put on a collar
In some situations, protection is worn in the clinic. In all other cases, you will have to cope with this difficult task yourself.
The collar should fit in size and not press or hang around your neck. Before putting on the accessory, you need to calm the animal. If the cat starts to get nervous, you need to pet it, carry it in your arms, talk to it in a calm voice and then try to put on the accessory again.
Important! You need to periodically check how correctly the collar fits. After all, the pet may try to remove it and thereby move it so that it becomes uncomfortable. The distance between the barrier and the neck should be at least 1 cm.
How to put on a collar
Other options
Here are a few more options for the protective Elizabethan collar. They are suitable for special occasions, but are uncomfortable for everyday wear.
Inflatable
If you often travel with your dog, it is better to worry about possible troubles in advance. Today, in veterinary pharmacies and pet stores you can find an inflatable protective collar with Velcro. Such accessories come in different sizes, are quite compact and do not take up much space. In addition, inflatable collars are made of special materials that do not cause allergies and are suitable for long-term wearing.
From a cardboard plate
An improvised collar for a small dog or cat can be made from an ordinary disposable cardboard plate. It needs to be cut to the middle, and a hole made inside along the diameter of the animal’s neck. Now the plate needs to be rolled into a cone and secured to the animal’s neck with tape.
This design is excellent for protecting the animal from parasites during treatment. It won't last long wearing, but for a few hours it's just right.
Wearing rules
Putting a collar on an animal is only a small part of the job. The owner must help him get used to the new wardrobe item. At first, it is removed before feeding.
When an animal undergoes a course of injection treatment and is given injections in the scruff of the neck, the accessory must be worn in such a way that the rough fastener does not rest on this place.
They also do periods of rest from the collar. For this purpose, the kitten is temporarily freed from the product, but so that it does not harm itself at this time, it is held in their arms.
Advice! If the pet strongly protests against the veterinary accessory, you need to periodically remove it, but then put it on again as soon as the animal has rested a little.
Making a protective product for a pet
You can make a collar for your pet yourself. There are several different ways to make it, depending on the materials chosen.
If you don’t have time to purchase a collar, but you need it urgently, you can build it in a short time from what you have at hand. You will need:
- thick cardboard;
- tape measure;
- compass;
- stapler;
- scissors;
- scotch.
The procedure is as follows:
- On a sheet of cardboard we draw a semicircle (diameter - 20–25 centimeters).
- Cut out the part and roll it into a funnel.
- Using a measuring tape, we find out the circumference of the pet’s neck.
- At the base of the cone we make a hole, the diameter of which is equal to the circumference of the cat’s neck.
- After you wrap the future collar around the cat’s neck, its side sections will need to be secured with a stapler or tape.
Plastic
Many owners prefer homemade devices to protect their pet from self-harm. The easiest way to make a design is for small breeds of dogs. The material for the collar in this case can be an unnecessary x-ray or a flexible office plastic folder for papers. Thick corrugated cardboard is suitable for the same purpose.
From the selected material, cut a blank in the form of half a donut. To ensure that the collar fits well and does not hinder your pet’s movements, you should know two parameters: neck girth (the diameter of the fastened collar) and the length from the neck to the tip of the nose. The first measurement on the workpiece is the inner diameter of the circle. You should add 5 cm to the second - this will be the outer diameter of the workpiece.
Collar pattern
After the future collar is cut from the selected material, its edges can be treated with soft fabric for comfortable wearing. It can be sewn or glued on both sides of the workpiece. To make the device convenient to put on your pet, it should be equipped with strong adhesive tape or lacing along the side of the cone. To attach to a collar or harness, it is most convenient to use lacing or special fasteners.
Cardboard protective collar
For a large breed, a protective structure can be made from a soft plastic bucket. To do this, cut a hole in a suitable size bucket along the diameter of the pet’s neck and make a side cut so that the homemade collar can be put on the dog. The protective product is secured with lacing.
If the animal is medium-sized, then you can use a large plastic bottle to make a homemade Elizabethan collar. When performing work manually, avoid sharp edges to avoid injuring your pet.
A collar for a fluffy and tender cat must be made of soft material. It will resemble a cushion or pillow. Your cat will love this device. It is comfortable to sleep on, cozy and light.
Making a cat collar takes a little effort. The first thing you need to do is cut out and sew together a pair of identical parts. Your best bet is cotton, linen, or other natural fiber fabric. Next, you need to put thick cap fabric inside so that it holds the shape of this product. If you do not have such fabric, you can replace it, sew several blanks and form a solid cone.
Sew a border along the outer edge of the product so that it does not lose its shape. If your cat doesn't like the Velcro product and keeps taking it off, you can replace the closure with a lace-up one. He can't handle her. Unfortunately, such protection also has a drawback. It is difficult to predict how long she will tolerate your cat's abuse. The collar may wrinkle, and then you will have to replace the same cap fabric with plastic.
For calm pets, we will make a craft using a plastic bucket, seedling pot or bottle, cutting out a cone. The craft should have straps to cover the collar and a clasp, and the best option would be a harness. It will reduce the load on the cat's neck and additionally support his head.
You can also make a craft in a hurry. Take cardboard, draw and cut out a semicircle, roll it into a tube. Try the protection on the cat, cut off all excess. Sections can be sealed with tape or fabric strips. To prevent your pet from pulling off the product you made, you can attach loops to it through which the collar is put on.
Sorry, there are no surveys available at this time.
READ What is demodicosis in cats and how to treat it
Such protection can be made from a variety of materials. This can be thick fabric, plastic, which we will take from a bottle or flower pot, you can also use cardboard. We will demonstrate this craft to you using a specific example, namely cardboard.
What you will need:
- Scissors
- Lace
- Scotch
- Thick cardboard
- A little of your time
Instructions
The algorithm of actions is as follows:
- Draw a semicircle on the cardboard and cut it out.
- Roll it into a tube so that it is not too tough.
- Try the future collar on the cat. Anything that is unnecessary, cut it off.
- Cover all the cuts with tape so they don't damage your cat's neck.
- Make holes in the cardboard and insert strings.
- For convenience, you can make loops on the edges. They can be cut out just like from cardboard. Attach the loops to the collar using tape or string.
- Pull the collar through the loops and put it on the cat. This way he will hold on tighter.
- Keep the protection on your pet until you visit the veterinarian.
This craft prevents the animal from self-harming. Its cone-shaped shape does not interfere with your pet while sleeping or walking. This cat collar is easy to use. Can also be used on small kittens by choosing the right size.
Good luck with the craft!
You can make a neck collar for a pet yourself if you suddenly need such a collar urgently, but you can’t buy it or the store doesn’t have the appropriate size. The simplest materials are suitable for this: cardboard, plastic, dense material.
From fabric
The advantage of a fabric collar is its softness; it serves as a pillow for the cat. But if she tries to take it off, make a tougher option. For self-production you will need: tape measure, scissors, material, marker, stapler, tape.
Step by step steps:
- Take two measurements: the first is neck circumference; the second is the length of the head (from the collar to the tip of the nose).
- Make a template out of paper, draw an inner semicircle with a compass, which corresponds to the first measurement, retreat to the distance of the second, mark the outer semicircle. Add an extra 2.5 cm for seams.
- Cut out the paper pattern according to the dimensions.
- Cut out two parts of the product onto the fabric.
- Proceed with assembly.
- Fold the right side out, place a piece of cardboard between the pieces of fabric, connect, sew the two halves together.
- Instead of cardboard, you can use another dense layer: felt, non-woven fabric, and sew all the blanks together with a diamond-shaped seam.
- Connect the edges with Velcro.
- Make lacing from fabric or, better yet, from flexible plastic on the inner edge to secure it to the animal’s neck.
Sew a thick fabric border along the outer edge. Another option is to buy a plastic collar and adjust the dimensions according to the dimensions of the animal. Then sew on thick soft fabric.
From the bottle
The product will be flexible and durable, the protective barrier will last a long time. For this you need: a plastic bottle of a suitable size, tape, adhesive tape or string. First take your measurements. Then cut out the parts from paper. Cut out a cone according to the paper diagram. Make holes using a nail or a thick needle.
Second way:
- On the side of the neck, mark with a marker a diameter equal to the circumference of the cat’s neck.
- Cut off this part and measure the length of your pet's head.
- Cut off the remaining plastic.
- Cut lengthwise and try it on the animal.
- Make holes along the cutting line and thread lacing made of soft fabric.
You can secure the Velcro fastener with a stapler. Cover sharp cuts with adhesive tape or tape.
Quick option
For an emergency, a cardboard cone is suitable, although it is not intended to last for a long time. Instructions:
- Prepare thick cardboard (shoe boxes, household appliances).
- Take measurements from the animal.
- Mark them on cardboard.
- Cut according to the design with scissors.
- Wrap the edges of the structure with tape.
- Secure the cone parts with adhesive tape.
- Make loops for the collar.
This method is suitable when the animal has not yet recovered from anesthesia.
Other
The following available materials are used for veterinary collars: polyethylene paper folders, disposable paper plates, lampshades, wastebaskets.
How long should you wear the collar?
Injuries, post-operative scars and skin diseases require caring and attentive treatment. The animal will try to lick its wounds, and if you allow it to do so, the healing process will be delayed. An infection may also occur, leading to serious complications.
On average, the rehabilitation period lasts from one to two weeks. But in each individual case the process takes place individually, because the animal’s recovery period depends on the state of health, age and its body. Attention and care for the kitten will quickly bring the animal back to normal. A comfortable rehabilitation period depends entirely on the efforts of the owner.
Feature of the pattern
To protect a dog from self-harm during treatment or recovery after surgery, a wide variety of Elizabethan collars are used. The design of almost all protective devices is a truncated cone, the narrow part of which is fixed on the animal’s neck. Collars of various shapes and materials allow owners to choose the most optimal option for their restless pet.
READ Cat diseases: symptoms and treatment of major diseases
Soft
Soft models of protective collars are popular among owners. Their advantage is that the devices do not produce unpleasant or frightening sounds for the pet. Soft means of protection against self-injury are made of water-repellent hypoallergenic material. Due to their lightness and flexibility, fabric models do not impede the pet’s movement, allowing them to easily take food and water, and sleep without experiencing discomfort.
The positive aspects of soft devices made of non-fabric material include their wear resistance and ease of storage and transportation. Soft models can be folded compactly and taken with you on a trip. Such devices are not suitable for large animals, since they do not completely cover the head, and the pet can wrinkle the collar.
In specialized stores, soft devices are available for sale, reinforced with a plastic insert, which gives the structure rigidity and prevents unwanted actions of the pet. Many models of soft collars are equipped with Velcro, which help securely fix the device on the dog's neck.
Inflatable
Models of protective structures for pets in the form of an inflatable lifebuoy are usually made of soft and flexible materials. The convenience of such devices is their ease of use. Inflatable models do not cause discomfort to the dog, do not restrict freedom and are pleasant to the body. Models equipped with a nylon cover are durable.
Ease of storage and transportation, ensuring comfort when worn, make inflatable collar models popular among owners of dogs with short limbs. Short pets are physically unable to reach the protection on the neck and pull it off. For representatives of large breeds with long limbs, such collar models are not suitable.
Plastic
Plastic models of protective devices are widely available in pet stores. They are made of transparent or colored material and are inexpensive. A positive quality of plastic barrier products is the ability to quickly clean them from contaminants and the use of disinfectants. The transparent design allows your pet to have unlimited visibility.
The disadvantage of plastic Elizabethan collars is the high noise level. Animals often get scared, especially when they touch foreign objects with the device. In addition, plastic models become brittle over time, cracking and breaking.
An alternative may be elastic neck corsets. They are made of foam material and are used when the diseased area is on the body of the animal, and not on the head.
The collar is purchased in a special store or made from plastic, cardboard, or fabric. The pattern looks like a half ring. Height, length, width depend on the size of the animal. A collar similar to a cap is made from it, with a cutout for the neck and the edges are fastened. First, measure the circumference of the neck, this is the length of the inner semicircle and the length from the neck to the tip of the nose. The collar is not made too high so that the cat can see its surroundings.
Table: advantages and disadvantages of protective devices
It is important for every caring owner to understand the benefits of protection and whether it can harm the pet. A protective collar, like any device, has its advantages and disadvantages. Having studied them, the owner will be able to understand that the benefits from it are much greater than the disadvantages.
It is enough to make a simple comparison:
| Disadvantages of a collar | Advantages of a collar |
| Animal discomfort | Durable and reliable |
| Discomfort when eating | Wide range of applications |
| Difficulty in selecting a model for large or small animals | Protects against wound infection |
| Clean cats cannot lick themselves while wearing this accessory. | Prevents the animal from hiding in a hard-to-reach place |
| Ability to cling to objects | Large selection of options in different price categories |
In barrier therapy, the protective collar for cats has proven its effectiveness in practice. It allows you to maintain good health during conservative treatment or in the postoperative period. A properly selected collar will allow the cat to recover comfortably and without harm to health.
How to put a post-op collar on a cat?
After surgery, the cat must be handled with extreme care: do not squeeze it, do not grab it sharply and do not forcibly pull it out, holding it by the paws, from somewhere in order to avoid damage to the sutures, internal bleeding or an epileptic seizure.
Problems when wearing a postoperative collar:
- A collar that is too large or heavy for a cat will greatly impair coordination: it will be difficult and even impossible for him to jump anywhere, pass between objects, eat and drink.
- An excessively tight collar will lead to hypoxia - oxygen starvation of the brain, poor circulation, chafing of the skin at the point of contact, and damage to the coat.
- An animal can remove an excessively loose collar, or it will slip lower and complicate movement.
- It is unacceptable to buy collars with a strong “chemical” smell. These products are of low quality and your cat may be poisoned by wearing them.
- Buying a collar for a kitten to grow into is not the best solution. A young animal will feel uncomfortable in a bulky structure designed for an adult. A collar is not such an expensive thing to buy for future use. It is better to select it individually each time than to squeeze a large cat into a small collar or try to attach a device purchased for an older cat to a “teenager”.
- The sharp edge of the collar at the point of contact with the cat’s body should be covered with an adhesive plaster on a fabric basis.
- The collar must be removed periodically to allow the animal to run freely and restore muscle tone. It would be good to put a blanket on a cat after abdominal surgery. The animal must not be left unattended while the collar is removed.
- A protective collar for cats is necessary for various types of medical interventions. It preserves the health of the animal, being a necessary measure in the postoperative period and during conservative treatment with drugs for external use. The cat quickly gets used to the inconvenience of wearing it. In addition, a properly selected protective collar almost does not cause them.
Video
Fabric collar
When the problem area is close to the front of the cat, you can take more gentle measures.
In this case, you can choose a protective cat collar made of fabric. These collars are very light, but at the same time very comfortable.
They are needed for very picky people, or if the owner himself does not want additional stress for the animal.
If you are very concerned about the price of such a cat collar, you can make it yourself without any problems. Its design is quite simple, and everything can be made from one piece of fabric and filler.
First of all, we need to take a piece of fabric, the size of which depends on your pet, filler, preferably natural, and sewing tools.
We will need to cut a circle from the fabric, inside which we will make a through hole, the dimensions of which depend on the circumference of the cat’s neck.
We suggest you read: The cat’s back legs have failed: reasons and what to do
After this, we need to cut the resulting bagel into two parts, which will be the top and bottom.
We put a soft filler in the middle, stitching it from time to time. After all, you need to add buttons or Velcro to the edges of the collar, which will make it possible to fix it on the cat’s neck.