Dog fashion: whim or necessity?
Among owners of large breeds of dogs and those who do not have animals at all, you can often find people who are quite skeptical towards owners of small and medium-sized pets: they say, dress up the animals like dolls! Meanwhile, this approach is not entirely fair. Artificially bred small breeds are very cold, and in the warm season they are more susceptible to insect and tick bites than others. Therefore, dog fashion is rather a necessity rather than a whim of loving owners. The most popular and comfortable outfit for a dog is a jumpsuit, and cutting and sewing it is easy even for an ordinary person.
Recommendations for choosing fabric
The fabric for overalls is selected depending on the season. If you are sewing a demi-season outfit, then the material should be:
- ventilated (so the skin can breathe);
- durable (then no bush branches or tall dead wood are scary);
- waterproof (wet fabric sticking to the dog’s body is a guarantee of pneumonia).
Membrane fabric is ideal for such tasks. A thin film is glued to the fabric of such fabric. For the winter version, you will also need a lining - preferably not on a mesh basis, otherwise the hair will get into the perforations, and putting on the outfit will be painful for the dog. It is better to take viscose, satin, twill, etc. As for summer overalls, they can be sewn from thin raincoat fabric or microfiber.
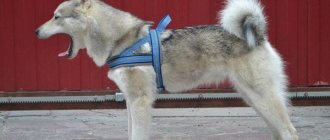
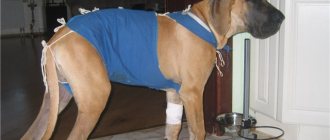
Vest
A vest is one of the most optimal clothing options for dogs. It does not restrict movement, like many overalls, the paws remain free, and the elastic band under the butt does not press! At the same time, the vest protects the torso from cold and slush. Even on frosty winter days, for many dogs it is enough to wear an insulated vest.
To sew such clothes for a dog, you only need to take three measurements:
- back length;
- chest girth;
- neck girth.
Divide the result obtained from measuring the length of the back for the vest by 10. This number will determine the side of the square of the pattern mesh. We draw a grid and transfer the contours of all the details onto it to scale.
Important Note
The pattern, marked in blue, is intended for a boy. For the girl, we lengthen the shelf detail, completing the pink image.
The proposed pattern shows two collar options - for the off-season and for frostier weather. You can choose any one you wish, but consider the size of the collar when purchasing a zipper.
In addition, patterns for sleeves are given on the grid. In our master class, the vest was made without them. The feasibility of their presence is determined by you at will, taking into account what weather the vest is intended for.
We need to prepare:
- water-repellent membrane fabric;
- lining fabric on padding polyester (stitch);
- zipper.
Step-by-step sewing instructions with photos
We mark the contours of the parts on the main and lining fabric, secure with pins, and cut out with 1 cm allowances along all seams.
We sew side seams on the main and lining fabric.
Place the main and lining pieces with their right sides facing each other, and sew down the bottom edges and sleeve edges.
We turn it inside out and sew a finishing seam along the profile of the armholes and the bottom edge.
We connect the shoulder sections with basting and perform fitting. If necessary, we make adjustments.
In our case, we had to slightly expand the product with a bar.
We sew machine seams on the shoulders and sew on the collar.
Attaching the zipper.
We attach a wide elastic band along the lower abdomen for a snug fit of the product.
What the front and back sides look like when unfolded is shown in the photo below.
A little about fasteners
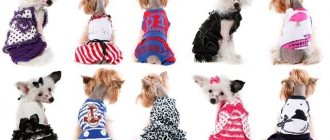
A comfortable cut for a dog jumpsuit pattern is only half the success. The second part depends on the correct fastener. For fastening the following are used:
- buttons (convenient for demi-season and summer clothes for small breeds);
- Velcro (suitable for any season, but require additional fasteners);
- ties (act as decorative fastenings, and only for small dogs);
- elastic bands (the fastener is universal, since depending on the thickness it can be used for “clients” of different weight categories).
Basic jumpsuit pattern
Any step-by-step instructions describing how to sew a jumpsuit for a dog with your own hands are based on the basic model, that is, without sleeves and legs.
Materials:
- newspaper or pattern paper;
- pencil;
- ruler;
- textile;
- Velcro;
- rubber;
- thread, needle.
Instructions:
- We measure the length of the dog's back (from the collar to the beginning of the tail).
- We measure the half-circumference of the widest part of the chest.
- On paper we draw a rectangle according to these measurements.
- In the second third we make a hole for the paws, departing from the vertical lines about 5-10 cm (depending on the size of the pet).
- Draw the neckline and cut out the pattern.
- We lay the paper on the fabric folded in half, outline and cut out, not forgetting about the allowances.
- Having swept away the shelves, we try them on. If necessary, we increase the armholes.
- We put together the details.
- We process the cuts with a facing.
- We sew on Velcro for the fastener and pull elastic bands into the armholes.
This model can be complemented with sleeves and “pants”. To do this, we cut out 4 rectangles, slightly round one narrow part, and, stitching along the edges, sew them into the armholes. We reinforce the cuffs with an elastic band.
Tips for sewing clothes for dogs of different breeds
When making clothes for dogs, it is important to take into account not only the climate, season, breed and gender of the animal, and to carefully think through the placement of parts in this regard, but also the character of the pet. Dogs often play with other animals while walking, rub against trees and poles, run diligently and perform tricks at the behest of their owner. Therefore, clothing must be made not only of high-quality and durable material, but also tightly stitched, so that it is impossible to easily tear off parts of the general pattern for dogs.
You might be interested in: Creating patterns and sewing phone cases with your own hands
Universal outfit for dogs
In addition, you need to think about safety. It’s not uncommon for novice craftsmen to sew on a lot of unnecessary parts, which come off and are swallowed by the pet.
Note! It is necessary to place accents where the dog cannot reach with teeth or claws. This is important to remember when making products.
Overalls for dachshund
The dachshund is the most unusual breed of dog. It requires special patterns, since it differs from other animals in the height of its paws, the length of its body and neck. She also often has long, furry ears and a small head. Making overalls for a dachshund is very simple from the material presented above, but it is much more interesting to make it from ordinary socks. At the same time, it is not necessary to have any special sewing skills to get a high-quality and comfortable product. You need to prepare:
- Socks;
- Yarn;
- Elastic type of thread;
- Needle with hook;
- Paper with a ruler.
The work process is as follows: First, you need to place the sock with the heel up and draw a line from the center to the other edge. After this, step back 3 centimeters from the heel and draw a line perpendicular to the one already drawn. Measure 10 centimeters from the perpendicular strip and draw another similar line. Make a mark for the paws on the created stripes. On paper, draw a template for the pattern - circles with a diameter of 6 by 3 centimeters.
Pattern for sewing clothes for a dachshund
Fix the templates using threads in the indicated places on the textile. Cut out circles on the fabric and remove the paper blanks. Using a hook and yarn, tie the holes, making double crochets. Try the blank on the animal and make holes for the legs, tail, head and urethra.
Ready product
For toy terrier
The Toy Terrier differs from other dog breeds in that it has a very thin body and stick-thin legs. Therefore, it is necessary to carefully measure everything before creating clothes. To do this, you should take a measuring tape and write down all the measurements, namely the parameters of the length of the back with the chest, neck, distance from the front to hind legs, the length of the abdomen and the diameter of each paw.
Regardless of which particular model of overalls was chosen, the algorithm of actions will look like this:
- Taking measurements and creating life-size patterns;
Patterns for toy terrier
- Cutting out templates and applying to the wrong side of the fabric;
- Fixing with pins and outlining with chalk;
- Cutting out the pattern with a margin of 2 centimeters;
- Cutting out the lining and sewing the parts where they join;
- Making hems for elastic bands and folds for edges;
- Trying on the product and adjusting to production sizes;
- Threading elastic bands into the cuffs, creating a zipper and turning the product right side out.
Note! Additionally, you can decorate the resulting product using various buttons fixed on both sides, pockets, luminous lines for walking in the dark.
You might be interested in Fabric for sewing a kimono: patterns and sewing order
Clothes for Toy Terrier
We cut and sew clothes for Yorkies
Making your own jumpsuit patterns for a Yorkie requires special attention, since the parts to be cut out are very small. Such calculations must be especially accurate.
Materials:
- a sheet of wallpaper with a smooth back side;
- pencil;
- ruler;
- textile;
- accessories;
- scissors;
- thread, needle.
Instructions:
- We measure the length of the back and divide by 8. The result is the side of the square into which we divide the sheet of paper.
- We mark the line of the half-circumference of the chest.
- Set aside a piece of length and draw a neckline.
- We measure the length and width of the paws and draw the part on the drawing.
- Separately, draw the inner side of the “pants”. Their length will be equal to 2/3 of the length of the foot.
- We round the corners under the paws and the tail part.
- We cut out the template, outline it on the fabric, leave allowances and cut it out.
- We sew the parts, try them on and sew them together.
- We process the seams (simply hem them or sew them with bias tape).
- We sew on the buttons and sew elastic on the neck and cuffs. The outfit is ready.
If you want the overalls to fit better, then you need to cut out the top and bottom parts separately.
Instructions:
- We measure the length of the backrest and mark a horizontal segment on the drawing.
- We make a neckline, a small transition (about 5 cm) to the armhole and the hole itself for the front paws.
- We decorate the back part in a semicircle to cut out the tail.
- We measure a segment equal to the length of the hind legs.
- Separately, we cut out the lower part of the shirt: draw a trapezoid, the upper base of which is equal to the distance between the paws, and the lower base is equal to the width of the sternum.
- Draw the desired sleeve length. Connecting the lines.
- We build a pattern for the inside of the pants, based on the distance between the hind legs and the length of the legs.
- Transfer the pattern to the fabric.
- We sew down the details, paying attention to the fact that part of the boy’s tummy remains open. For a girl, we sew a shirt and pants together.
DIY knitted clothes
In the off-season and before the cold weather sets in, knitted items will keep your baby warm. Having knitting skills, you can easily diversify your Yorkie’s wardrobe with warm and bright sweaters, blankets, and vests.
The measurements and patterns for knitting and sewing are the same . In each individual case, you need to take into account the length and volume of your pet’s fur and add 1-2 centimeters to the measurements. Otherwise, clothing can hinder movement, wring and tangle the fur, which the Yorkshire Terrier has a lot of.
You can start knitting clothes for your Yorkie with your own hands with something simple - a sleeveless sweater, for example. Knitting pattern:
- First of all, we always knit the back - we cast on the knitting needles the estimated number of loops. For a dog with a chest volume of 38 cm, this is approximately 45-50 loops.
- We knit the initial 10 rows with an elastic band - this will be the neckline, then any knitting as desired (garter stitch, stockinette stitch, patterns) for about 50 rows.
- We finish with an elastic band at the waist for 12-15 rows. The lower part (chest) is knitted in reverse order, from the waist to the neckline.
- We cast on about 15-20 loops. We don’t make an elastic band at the waist, we start right away with the main fabric. Having knitted 24-26 rows (about 10 cm), we begin to symmetrically decrease the loops along the edges of the next 20-22 rows (7-9 cm). We finish the piece with an elastic neckline (10 rows).
- Sew the parts together, leaving slits for the front paws. If desired, you can knit the sleeves - knit two rectangles according to the paw measurements, sew them into cylinders and sew them to the sweater.
The exact number of loops and rows depends on the size of your dog and the thickness of the selected threads and knitting needles. The back can be lengthened as desired, and the bottom of a girl's sweater can also be made longer. If you want to make a collar with a turn-up, double the number of rows of elastic at the neck.
Choose threads that contain at least 40% natural wool or cotton fibers. Check the quality of the dye to avoid staining your pet's fur.