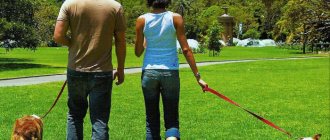
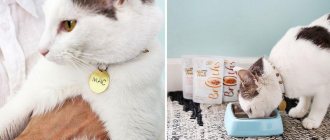
01/08/2021 Maria Ivanovna Handicraft Surely your pet already has a dozen collars - this is the gray one you usually walk with. And also glamorous with pink accents - so that you won’t be ashamed to appear in public. Well, and new, clean - for a veterinary hospital, for example. And, also, to get to know everyone in the park - bright, catchy. And the old one, which lies just in case in a box along with the one that was the very first and remained as a keepsake...
And even though there are three new ones, donated by friends, a DIY collar is something completely special. What every dog and cat lover should definitely do!
However, you can start with the fact that a DIY collar is a simple and uncomplicated alternative to expensive things. It's no secret that accessories for pets are offered on the market at inflated prices: they say, if a person can afford a pet, then he will definitely afford all sorts of necessary and unnecessary bells and whistles for him. Of course, you can afford it, but why pay for something you can do yourself? Saving wisely is actually a rather rare talent to be proud of and worth developing.
In addition, the beauty of a DIY collar is, of course, the possibilities that open up for its creators in terms of design. Oh, how many different options can be realized if you approach the issue creatively and with imagination! Just imagine - you can sew a collar that will match your new purple boots. And make it the one you’ve always dreamed of - yellow with blue polka dots.
And you can definitely easily figure out how to sew a collar yourself if you need to recycle leftover red twine in this project. And even if it seems to you that beads and beads are a suitable decoration for a collar, you can prove the rationality of your idea in practice.
Often, pet owners design and sew collars for them with their own hands to emphasize the individuality of a dog or cat and make them stand out from other animals. Whether this is good or bad is another question, but no one can argue that admiring a dog with a colorful neckerchief or a cat with a bow tie is actually very cool.
Let there be more positive things in your life!
Soft dog collar made of grosgrain ribbon
The JRT club channel shows how to make a soft collar for a dog using grosgrain ribbon and plastic fittings:
Happy creativity!
Source: darievna.ru
how to make a collar for a cat with your own hands, how to make a collar for a cat with your own hands, how to make a collar for a dog with your own hands, a collar for a cat with your own hands, a collar for a cat with your own hands, a collar for dogs with your own hands, a collar controller with your own hands, a collar with your own hands , DIY collar video, DIY leash, collar controller, DIY glowing collars for dogs, DIY glowing collar for dogs, DIY glowing collar, making a DIY collar
DIY LEATHER COLLAR – VIDEO
DIY leather collar
© Author: YULIA VOLOSHEK
TOOLS FOR CRAFTSMAN AND CRAFTSMAN, AND HOUSEHOLD GOODS VERY CHEAP. FREE SHIPPING. THERE ARE REVIEWS.
Below are other entries on the topic “How to do it yourself - for a homeowner!”
- DIY jigsaw from an electric knife Quick jigsaw Our regular…
- Do-it-yourself tiled table - decor Decor of an old table Many people have somewhere...
- Hanging container for flowers with your own hands: photo How to make a hanging flower container Not...
- DIY stool with patterns HOW TO MAKE A BEAUTIFUL STOOL FROM...
- Do-it-yourself lifting mechanism for a cellar lid (+ drawing) Do-it-yourself cellar lid...
- DIY cane from a mop with your own hands HOW TO MAKE A CANE FROM AN OLD...
- Attachment-collar for twisting wires on a screwdriver with your own hands ATTACHMENT FOR A SCREWDRIVERS FOR TWISTING...
Subscribe to updates in our groups and share.
Let's be friends!
With your own hands > Simple and complex crafts > Do-it-yourself collar and leash for a dog (+ step-by-step PHOTO)
DIY leash
If the old leash is already worn out, and you don’t want to spend a decent amount on a new one, we offer a master class where you will learn how to make a leash for a dog at home.
Tools and materials
To make a rein 180 cm long, take:
- 210 cm of cotton tape or nylon 3 cm wide for a medium-sized dog (for large breeds we take a wider tape);
- decorative tape is 2 times narrower than the main one;
- carbine;
- needle and thread or sewing machine.
Step-by-step instruction
- Using a machine, sew the decorative braid to the main tape, which will further strengthen it.
- Fold the edge of the resulting tape so that you get a loop for the carabiner.
- Sew the loop several times for strength, after installing a carabiner there.
- On the other side, make a larger loop for your hand.
Manufacturing instructions
To make the handle more convenient and fit comfortably in the hand without rubbing the skin, the wooden blank can be wrapped in vinyl (artificial leather). Prepare a piece of vinyl slightly larger than the handle and cut the blank into the desired shape.
How many meters of rope you will need for a leash is up to you to judge. It all depends on the size and character of the dog, on the distance at which you are used to keeping the dog. Cut two pieces of rope to the required length.
If you prefer a nylon cord, then in order to prevent its ends from fluffing and the cord from coming apart, it needs to be melted. Heat the ends with a lighter or a match (the flame should not be strong!). If you are using cotton rope, you don't need to do this; the cotton will burn but not melt.
Thread one end of the rope through the hole in the swivel clamp and fold the rope until it fits into the clamp as shown in the photo. Do not leave an excessively long end of the rope at the exit. Clamp the rope with the tool in two places.
Clamp the rope with the tool in two places. This can be done with a flat hammer.
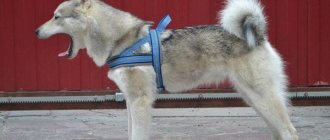
Pet stores sell a variety of equipment for four-legged pets. But you can make a dog collar with your own hands. A homemade accessory will turn out to be original and will cost several times less than a purchased one.
When making your own collar, you need to take into account three parameters: length, width and strength.
The length is measured using a measuring tape along the pet's neck or using an old collar. Additionally, a few centimeters are added for seams and fastenings.
The width depends on the thickness of the neck and accessories: rings, latches, rivets.
The standard size for large dogs is 2.5 cm. For a puppy and small breeds (Chihuahua, Toy Terrier) - half as much. The width of the fastenings should be the same.
The material is selected based on the owner’s taste and needs. The most durable and wear-resistant accessory is made of nylon, leather and textile sling. It is universal; any leash can be attached to it, including a show leash.
A noose collar is best made from a braided cord, and a collar across the body (harness) is made from textiles.
To make an original dog collar, use beautiful accessories: beads, beads, metal rivets, ribbons.
Leather collar for a dog: choice of material and accessories
How to sew a leather collar for a dog with your own hands?
This is not difficult, but the choice of materials and accessories should be treated with special care. This is especially important if you want to sew a collar for a large breed dog. The load that the collar must withstand will be large and the materials must be strong and reliable. For the collar itself you will need a piece of thick leather, natural or artificial. Our collar is made of two parts: outer
part of the collar is made of thick genuine leather, and
the inner part
is made of soft beige suede. You can also use leather for the inside, preferably vegetable tanned, to avoid possible staining of the dog's fur. The outer part of the collar can be made from several pieces, but the inner part must be cut from a single piece, without seams that can rub the animal's neck.
To make a collar you will need a buckle and a half ring to which the leash carabiner will be attached. If the buckle is one-sided, i.e. the tongue is located on the edge, you will need a loop to secure the edge of the collar. The belt loop can be sewn from a piece of the main material or a narrow metal frame can be installed, the length of which should correspond to the width of the buckle. If you use a buckle whose tongue is located in the middle, then the buckle itself will press the edge of the collar and an additional belt loop will not be needed.
Use only metal fittings, plastic may not withstand the load!
Please note that the half-ring for the carabiner can be either solid or bent from a thick metal rod, with the joining point on a flat edge. For a collar intended for small dogs, you can use a bent half-ring, but for dogs of large breeds, take a cast half-ring, it is much more reliable.
You will also need transparent waterproof glue, a knife or cutter and special threads for leather.
In order to correctly construct a pattern, you need to know the length and width of the collar. You can take a size from a model you are already using, measure a suitable collar in a store, or find the right sizes on the Internet. All fastenings or seams should be covered by the inside of the collar so that they do not touch the dog's neck.
So, let's sew a leather dog collar with your own hands!
Pattern construction and cutting
Based on the required dimensions, create a collar pattern. The pattern is symmetrical, i.e. you can draw only one half. We offer a collar model with an extended middle part.
In our case, the total length of the collar is 40 cm, the width in the center CD is 6 cm, the width at the edges AB is 2 cm. CD is the fold line. The length of the wide part is approximately 15 cm.
Cut out two parts of the collar, inner and outer. The allowance around the perimeter of the outer part is 5-7 mm, and on one of the narrow edges an additional 2 cm. The inner part is cut out without allowances.
Progress
- collar details
- accessories
- glue, threads
Trim the seam allowances at the corners of the outer collar piece as shown in the photo. Using a knife, remove the top layer from the underside of the seam allowances to make them thinner.
Apply glue to the allowances of the outer part and fold them to the wrong side. Press well.
Glue the inner part to the outer part, if necessary, trim the inner part so that the edge of the part does not peek out from the front side.
Sew along the very edge of the inner piece. Tie the threads in a double knot, thread them through the needle and pull them through the nearest stitch hole. Pull the needle out after 3-4 stitches and tighten the thread so that the knot goes inside the stitch. Cut the remaining threads close to the stitching.
Using a knife or a special punch, make a hole on one side of the collar, 2.5-3 cm from the edge. Place a fixing stitch along the edge of the hole, thread the threads as described earlier.
Place the half ring on the collar, then the loop and buckle.
Fold the edges over and sew it by hand. First, fix the fold after the belt loop, and then after the half ring, separating them from each other.
Sew the fold several times, tightening the thread well. Secure the thread with a double knot and thread as described earlier.
Punch several holes at the other end of the collar. The distance between the holes is 1-1.5 cm.
Every avid dog lover has a stock of pet supplies for all occasions. I propose to replenish the arsenal and tell you how to make a collar for a dog with your own hands
.
Paracord dog collar. How to make it yourself (master class with photos)
Nowadays, products in the “ hand-made”
are very popular. Firstly, it is a way to show your creativity. Secondly, you receive and become its sole owner. And, thirdly, when making such a thing, not only the work of the master, but also a piece of the soul is invested into it. All three of these aspects are very suitable for a dog owner.